
There is something magical about breaking open a warm muffin and discovering a smooth, creamy surprise inside. If you have ever spent money on fancy bakery muffins and wished you could make the same thing at home, you are in the right place. This recipe gives you everything you love about classic red velvet cake in an easy muffin that looks impressive but is surprisingly simple to make.
You don’t need special baking skills or expensive ingredients. With just a few pantry staples, you can bake soft, fluffy red velvet muffins filled with a rich cream cheese center that stays creamy in every bite. The beautiful red color makes them perfect for birthdays, Valentine’s Day, Christmas, or simply treating yourself on a cozy weekend morning.
The best part? These muffins stay moist, taste even better the next day, and fill your kitchen with the most amazing sweet vanilla and cocoa aroma. Once you try this recipe, you may never need to visit a bakery again.
What Is This Recipe?
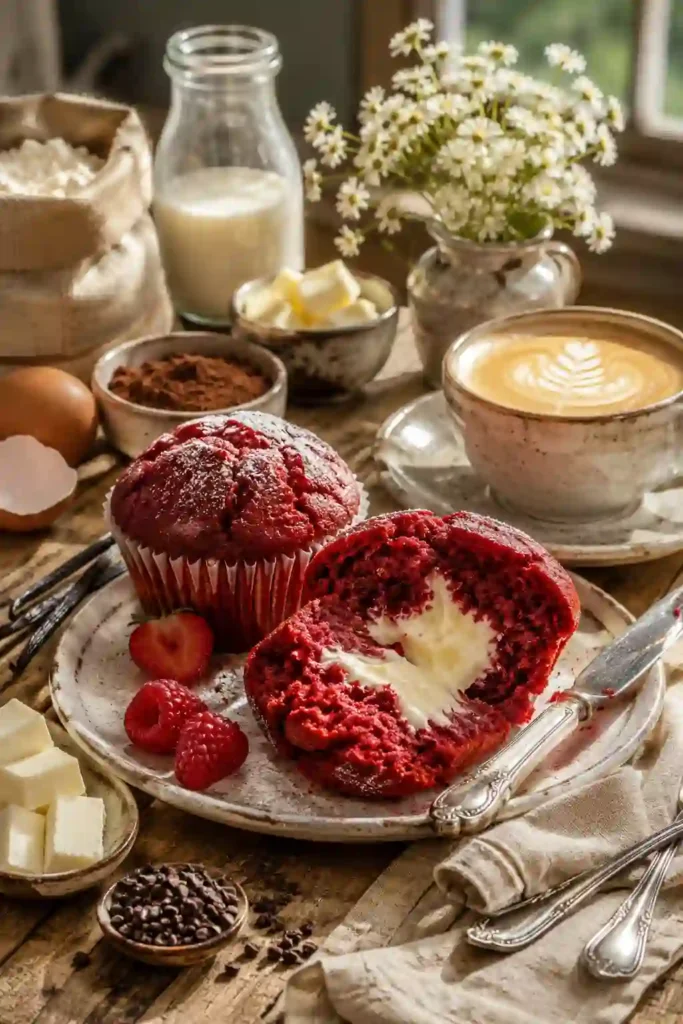
A Red Velvet Muffin Recipe with Cream Cheese Center combines the rich flavor of traditional red velvet cake with the convenience of a grab-and-go muffin. The muffin has a soft, tender crumb with a light cocoa flavor and a beautiful deep red color. Hidden inside is a creamy, slightly tangy cream cheese filling that balances the sweetness perfectly.
Unlike cupcakes covered with frosting, these muffins keep the cream cheese tucked inside, creating an exciting surprise every time someone takes a bite. They are perfect for breakfast, afternoon coffee, brunch, dessert, or sharing with family and friends. The combination of fluffy cake-like texture and creamy filling makes these muffins feel extra special without requiring complicated decorating.

Why You Will Love This Recipe
- Easy to make: No complicated baking techniques are needed, making this recipe beginner-friendly.
- Bakery-quality results: You get tall, soft muffins with a creamy center right from your own oven.
- Budget-friendly: Most ingredients are already sitting in your kitchen.
- Perfect texture: Every bite is moist, fluffy, and filled with creamy goodness.
- Great for holidays: The bright red color makes these muffins beautiful for celebrations.
- Freezer-friendly: Bake a batch now and enjoy them later.
- Kid-approved: Children love discovering the hidden cream cheese filling.
- Perfect for meal prep: Great for busy mornings and lunch boxes.
- Customizable: Add chocolate chips, berries, or nuts for extra flavor.
- Ready in about 40 minutes: Perfect when you need something delicious without spending all day baking.
Here’s where most people get this wrong…
Many people overmix the batter or add too much filling. Both mistakes can keep muffins from rising properly. The simple tips below will help you get soft, bakery-style muffins every time.
Ingredients
To make about 12 muffins, you’ll need:
- 2 cups all-purpose flour – Gives the muffins their soft structure. Spoon and level the flour instead of packing it into the measuring cup.
- 2 tablespoons unsweetened cocoa powder – Adds the classic light chocolate flavor without making the muffins too rich.
- 1 teaspoon baking powder – Helps create a beautiful rise.
- ½ teaspoon baking soda – Works with the acidic ingredients for extra fluffiness.
- ¼ teaspoon salt – Balances the sweetness and brings out the cocoa flavor.
- ¾ cup granulated sugar – Sweetens the muffins while helping create a tender crumb.
- 2 large eggs (room temperature) – Mix more smoothly and help create a fluffy texture.
- ½ cup vegetable oil – Keeps the muffins moist for days. Melted butter also works if you prefer a richer flavor.
- ½ cup buttermilk – Gives the muffins their classic tang and soft texture. You can make your own by adding ½ tablespoon lemon juice to regular milk.
- 1 teaspoon vanilla extract – Adds warm bakery flavor.
- 1 tablespoon red food coloring – Creates the signature bright red color. Gel coloring works especially well.
- 8 ounces cream cheese, softened – The star of the filling. Let it sit at room temperature for easy mixing.
- ¼ cup powdered sugar – Sweetens the cream cheese without making it grainy.
- ½ teaspoon vanilla extract – Adds extra flavor to the filling.
Fresh ingredients make a noticeable difference. Using room-temperature eggs, buttermilk, and cream cheese helps everything mix together smoothly, creating soft muffins with a creamy center.
How to Make Red Velvet Muffins with Cream Cheese Center
Step 1: Prepare Everything
Preheat your oven to 375°F (190°C) and line a 12-cup muffin pan with paper liners. In a small bowl, beat the softened cream cheese, powdered sugar, and vanilla until completely smooth and creamy. Place the filling in the refrigerator while preparing the batter. Keeping it slightly chilled makes it much easier to fill the muffins later. In another bowl, whisk together the flour, cocoa powder, baking powder, baking soda, and salt until evenly combined. This helps distribute the rising agents evenly so every muffin bakes the same.
Step 2: Make the Batter
In a large bowl, whisk together the sugar, eggs, oil, buttermilk, vanilla, and red food coloring until smooth and bright red. Slowly add the dry ingredients into the wet ingredients. Gently fold everything together using a spatula until no dry flour remains. The batter should look thick, smooth, and slightly fluffy. Small lumps are perfectly fine. Avoid stirring too much because overmixing develops gluten, making muffins dense instead of soft.
Step 3: Fill the Muffins
Spoon enough batter into each muffin liner to fill about one-third full. Add about one tablespoon of the chilled cream cheese filling directly into the center. Cover the filling with additional batter until each liner is about three-quarters full. Try not to let the cream cheese touch the paper liner because it may leak during baking.
This small trick makes a huge difference…
Keeping the filling completely surrounded by batter helps create that beautiful hidden creamy center after baking.
Step 4: Bake and Cool
Bake the muffins for 18–22 minutes until the tops are puffed and a toothpick inserted near the edge comes out mostly clean. The center may still be creamy, which is exactly what you want. Let the muffins cool in the pan for about 10 minutes before transferring them to a cooling rack. They taste wonderful slightly warm when the cream cheese is still soft and silky.
Pro Tips
- Use room-temperature ingredients for a smoother batter and lighter muffins.
- Chill the cream cheese filling before using so it stays in the center.
- Measure flour carefully to avoid dry muffins.
- Mix the batter gently until just combined.
- Fill liners only three-quarters full for beautiful domed tops.
- Use gel food coloring for a brighter red color without thinning the batter.
- Let muffins cool slightly before eating so the filling sets.
- Store leftovers in the refrigerator because of the cream cheese.
- Warm refrigerated muffins for about 15 seconds before serving.
- Sprinkle a few white chocolate chips into the batter for an extra bakery-style treat.
Common Mistakes to Avoid
- Overmixing the batter makes muffins tough.
- Using cold cream cheese creates lumpy filling.
- Overfilling muffin liners causes overflowing.
- Skipping paper liners makes removal difficult.
- Using expired baking powder reduces rise.
- Baking too long dries out the muffins.
- Adding too much cocoa hides the classic red velvet flavor.
- Forgetting salt makes the muffins taste flat.
- Opening the oven too early causes sinking.
- Not cooling before removing can make muffins break apart.
- Adding too much filling may cause leaking.
- Measuring flour incorrectly creates dense muffins.
Variations & Customization Ideas
Now let’s make it even better…
- High-protein version: Replace part of the flour with protein baking mix and use high-protein Greek yogurt.
- Mini muffins: Bake for 10–12 minutes for bite-sized treats.
- Chocolate chip version: Fold white or dark chocolate chips into the batter.
- Berry twist: Add fresh raspberries or chopped strawberries.
- Holiday version: Top with festive sprinkles before baking.
- Nutty version: Add chopped pecans or walnuts.
- Quick version: Use a boxed red velvet cake mix and homemade cream cheese filling.
- Lower-sugar version: Reduce sugar slightly and use a sugar substitute in the filling.
- Extra cocoa version: Add another teaspoon of cocoa for a richer flavor.
- Orange zest version: Add fresh orange zest for a bright citrus note.
Serving Ideas
These muffins taste amazing with hot coffee, cappuccino, tea, or cold milk. Serve them as part of a weekend brunch with fresh berries and yogurt. They also make a beautiful dessert when dusted with powdered sugar. Pack one in a lunch box, enjoy one after dinner, or bring a batch to parties, bake sales, or holiday gatherings.
Storage & Reheating
Store the muffins in an airtight container in the refrigerator for up to 5 days because of the cream cheese filling.
Freeze them individually for up to 3 months. Wrap each muffin tightly before freezing.
To reheat, microwave for 15–20 seconds or warm in a 300°F oven for about 5 minutes. This keeps the center creamy while making the muffin soft again.
Nutrition Facts (Approximate Per Muffin)
- Calories: 290
- Protein: 5g
- Carbohydrates: 35g
- Fat: 14g
- Saturated Fat: 5g
- Sugar: 20g
- Fiber: 1g
- Sodium: 220mg
Quick Summary
- Soft, fluffy bakery-style muffins
- Rich cream cheese center
- Ready in about 40 minutes
- Beginner-friendly recipe
- Perfect for holidays and brunch
- Freezer-friendly
- Easy pantry ingredients
- Beautiful red color
- Moist for several days
- Great for breakfast or dessert
When to Eat This Recipe
These muffins fit almost any moment of the day. Enjoy one during a busy morning when you need a quick breakfast with your coffee. Pack one as an afternoon snack to beat your sweet cravings. They are perfect after school for kids, as a cozy weekend brunch treat, or as a simple dessert after dinner. They also make a thoughtful homemade gift during the holidays, Valentine’s Day, birthdays, or family gatherings. If late-night dessert cravings hit, warming one for a few seconds gives you a soft, creamy treat that feels just like it came fresh from the bakery.

Red Velvet Muffin Recipe with Cream Cheese Center You’ll Want Every Weekend
Course: Muffins4
servings30
minutes40
minutes300
kcalIngredients
2 cups all-purpose flour – Gives the muffins their soft structure. Spoon and level the flour instead of packing it into the measuring cup.
2 tablespoons unsweetened cocoa powder – Adds the classic light chocolate flavor without making the muffins too rich.
1 teaspoon baking powder – Helps create a beautiful rise.
½ teaspoon baking soda – Works with the acidic ingredients for extra fluffiness.
¼ teaspoon salt – Balances the sweetness and brings out the cocoa flavor.
¾ cup granulated sugar – Sweetens the muffins while helping create a tender crumb.
2 large eggs (room temperature) – Mix more smoothly and help create a fluffy texture.
½ cup vegetable oil – Keeps the muffins moist for days. Melted butter also works if you prefer a richer flavor.
½ cup buttermilk – Gives the muffins their classic tang and soft texture. You can make your own by adding ½ tablespoon lemon juice to regular milk.
1 teaspoon vanilla extract – Adds warm bakery flavor.
1 tablespoon red food coloring – Creates the signature bright red color. Gel coloring works especially well.
8 ounces cream cheese, softened – The star of the filling. Let it sit at room temperature for easy mixing.
¼ cup powdered sugar – Sweetens the cream cheese without making it grainy.
½ teaspoon vanilla extract – Adds extra flavor to the filling.
Directions
- Prepare Everything
Preheat your oven to 375°F (190°C) and line a 12-cup muffin pan with paper liners. In a small bowl, beat the softened cream cheese, powdered sugar, and vanilla until completely smooth and creamy. Place the filling in the refrigerator while preparing the batter. Keeping it slightly chilled makes it much easier to fill the muffins later. In another bowl, whisk together the flour, cocoa powder, baking powder, baking soda, and salt until evenly combined. This helps distribute the rising agents evenly so every muffin bakes the same. - Make the Batter
In a large bowl, whisk together the sugar, eggs, oil, buttermilk, vanilla, and red food coloring until smooth and bright red. Slowly add the dry ingredients into the wet ingredients. Gently fold everything together using a spatula until no dry flour remains. The batter should look thick, smooth, and slightly fluffy. Small lumps are perfectly fine. Avoid stirring too much because overmixing develops gluten, making muffins dense instead of soft. - Fill the Muffins
Spoon enough batter into each muffin liner to fill about one-third full. Add about one tablespoon of the chilled cream cheese filling directly into the center. Cover the filling with additional batter until each liner is about three-quarters full. Try not to let the cream cheese touch the paper liner because it may leak during baking. - Bake and Cool
Bake the muffins for 18–22 minutes until the tops are puffed and a toothpick inserted near the edge comes out mostly clean. The center may still be creamy, which is exactly what you want. Let the muffins cool in the pan for about 10 minutes before transferring them to a cooling rack. They taste wonderful slightly warm when the cream cheese is still soft and silky.
Notes
- Chill the cream cheese filling before using so it stays in the center.
- Measure flour carefully to avoid dry muffins.
About