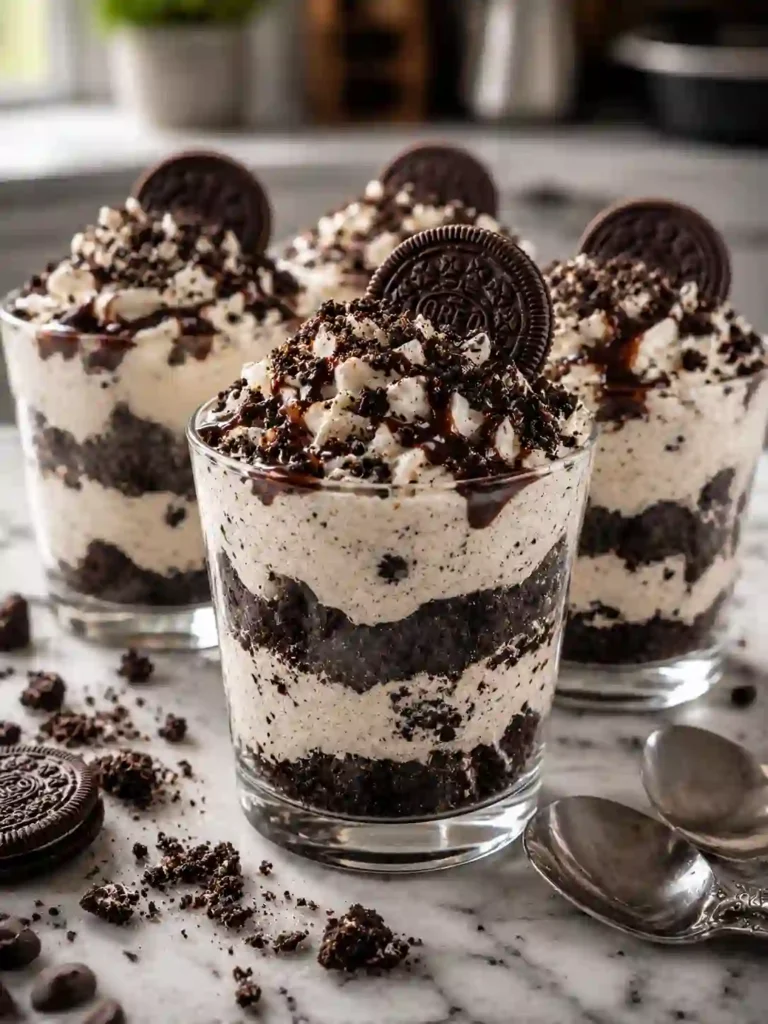
You know those moments when you want dessert right now but do not want to turn on the oven? That is exactly why these Oreo No-Bake Cheesecake Cups are so perfect. They are creamy, rich, sweet, and loaded with crunchy Oreo cookie pieces in every single bite.
The best part?
You can make them in very little time with simple ingredients you probably already have at home. No complicated baking steps. No stress. Just soft cheesecake filling, crushed Oreos, and layers of creamy goodness.
These cheesecake cups are perfect for birthday parties, movie nights, summer desserts, or even a late-night sweet craving after a long day. Once you taste the creamy texture mixed with crunchy cookie crumbs, you will want to make them again and again.
And honestly?
They look fancy enough to impress guests even though they are incredibly easy.
What Is This Recipe?
Oreo No-Bake Cheesecake Cups are small dessert cups filled with creamy cheesecake mixture and crushed Oreo cookies. Instead of baking a full cheesecake in the oven, everything is layered into cups and chilled until thick, creamy, and ready to eat.
What makes this recipe special is the texture. You get soft cheesecake filling, crunchy Oreo crumbs, and creamy whipped layers all together in one spoonful.
These dessert cups are fun, simple, and perfect for beginners. You do not need baking skills to make them look beautiful and delicious.
They are also easy to carry, serve, and store, which makes them great for parties and family gatherings.
Why You Will Love This Recipe
- You do not need an oven, which saves time and keeps the kitchen cool.
- The recipe uses simple ingredients that are easy to find.
- These cheesecake cups taste rich and creamy without being too heavy.
- They are cheaper than buying bakery desserts.
- The individual cups make serving easy and mess-free.
- Kids love helping crush the Oreo cookies and layer the cups.
- You can prepare them ahead of time for parties or busy days.
- The recipe feels fancy but is actually beginner-friendly.
- Oreo cookies add crunchy texture and deep chocolate flavor.
- You can customize the toppings and flavors in many fun ways.
Here’s where most people get this wrong…
They rush the chilling time. The cheesecake filling needs enough time to become thick, creamy, and perfectly smooth.
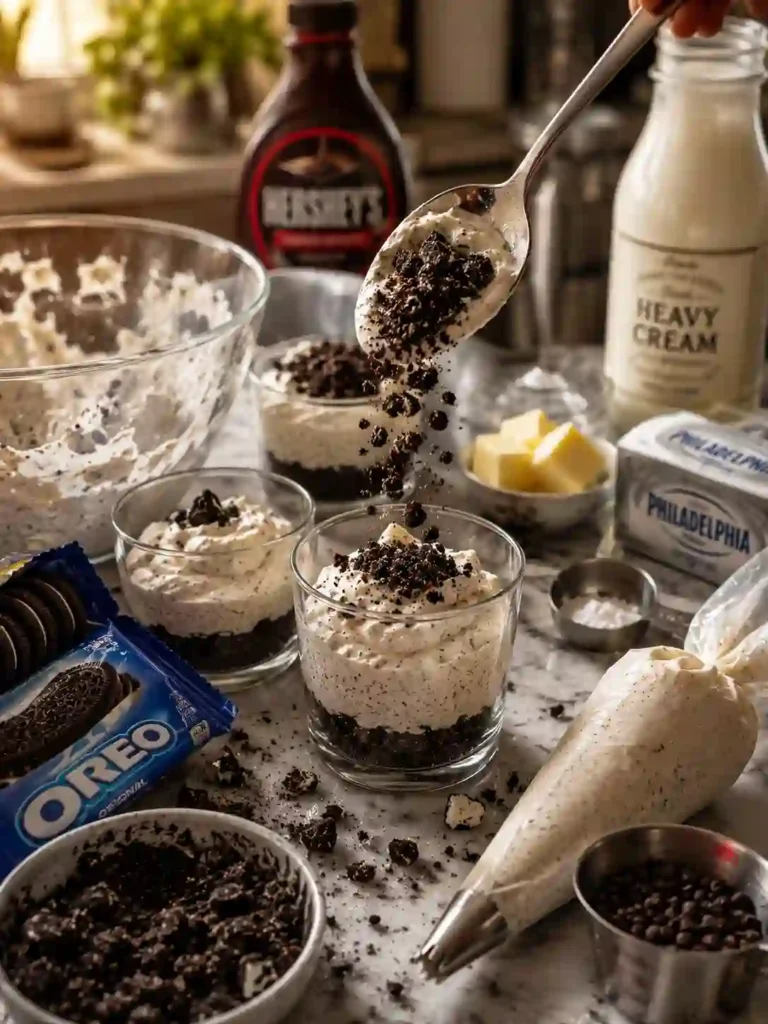
Ingredients
- 24 Oreo cookies crushed into crumbs for the layers and topping.
- 2 tablespoons melted butter to help the Oreo crumbs hold together.
- 8 ounces cream cheese softened at room temperature for smooth filling.
- 1 cup heavy whipping cream cold for fluffy texture.
- 1/2 cup powdered sugar for sweetness and smooth texture.
- 1 teaspoon vanilla extract for warm dessert flavor.
- 1 cup whipped topping or homemade whipped cream.
- Extra Oreo cookies for decorating the top.
- Chocolate syrup optional for extra richness.
- Mini chocolate chips optional for added crunch.
Using softened cream cheese is very important because cold cream cheese creates lumps in the filling. If you want extra chocolate flavor, use chocolate whipped cream instead of plain whipped cream.
You can also use golden Oreos for a sweeter vanilla flavor. Some people even mix peanut butter into the filling for a creamy chocolate-peanut butter twist.
Small clear dessert cups work best because they show the beautiful Oreo layers inside.
How To Make Oreo No-Bake Cheesecake Cups
1. Prepare the Oreo Crust Layer
Start by crushing the Oreo cookies into fine crumbs. You can use a food processor or place the cookies into a zip bag and crush them with a rolling pin. The crumbs should look soft and slightly sandy with small cookie pieces still visible.
Place the crushed Oreos into a bowl and pour in the melted butter. Stir everything together until the crumbs look slightly wet and hold together when pressed with a spoon.
Scoop a few spoonfuls of the Oreo mixture into the bottom of each dessert cup. Press the crumbs down gently using the back of a spoon. This creates the crunchy cookie base layer.
The buttery Oreo crust gives the cheesecake cups amazing texture and helps balance the creamy filling later.
Set the cups aside while you prepare the cheesecake mixture.
2. Make the Creamy Cheesecake Filling
In a large mixing bowl, beat the softened cream cheese until completely smooth and creamy. This step is important because lumps can ruin the texture later.
Add the powdered sugar and vanilla extract. Continue mixing until the filling becomes thick, soft, and silky smooth.
In a separate bowl, whip the cold heavy cream until fluffy peaks form. The whipped cream should look light, airy, and creamy.
Slowly fold the whipped cream into the cream cheese mixture using a spatula. Do not stir too hard because you want the filling to stay fluffy and soft.
Now crush a few extra Oreo cookies into chunky pieces and gently fold them into the cheesecake filling.
The mixture should now look creamy, thick, and packed with little Oreo pieces.
This small trick makes a huge difference…
Chill the filling for 10 minutes before layering. This helps create cleaner and thicker cheesecake layers.
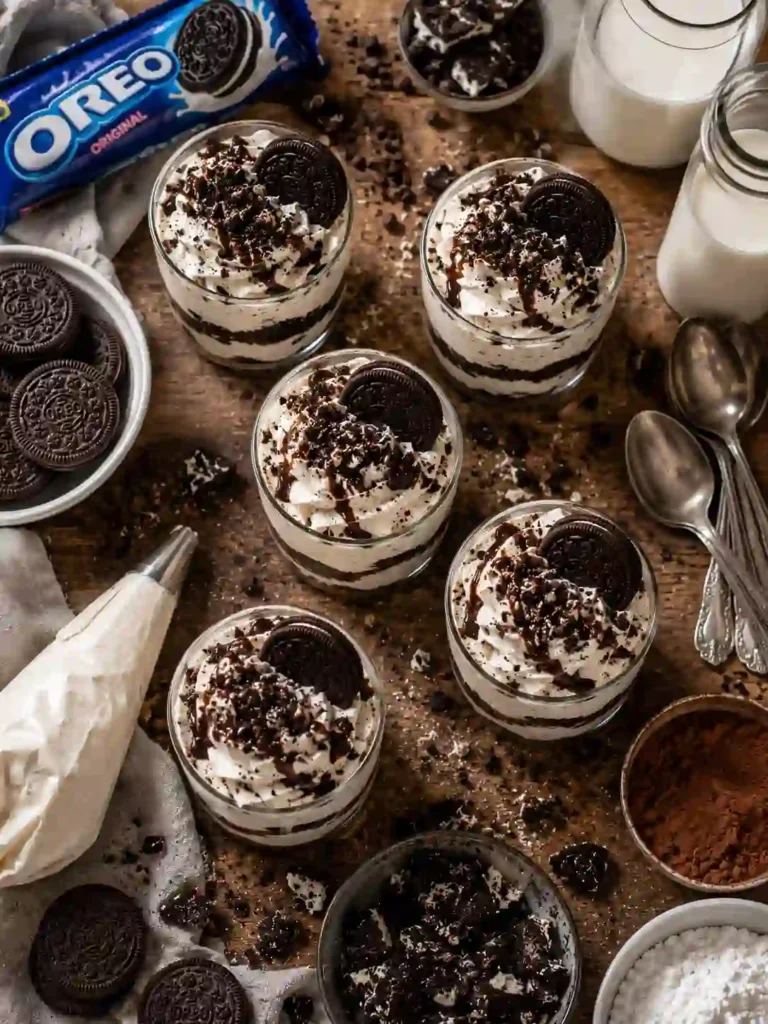
3. Layer and Chill the Cheesecake Cups
Spoon the cheesecake filling into each dessert cup over the Oreo crust layer. You can also use a piping bag for cleaner layers and prettier presentation.
Add another small layer of Oreo crumbs in the middle if you want extra crunch and flavor. Then top with more cheesecake filling.
Smooth the tops gently with the back of a spoon. Sprinkle crushed Oreo crumbs, mini chocolate chips, or extra cookie pieces on top.
For a bakery-style look, drizzle chocolate syrup across the tops before chilling.
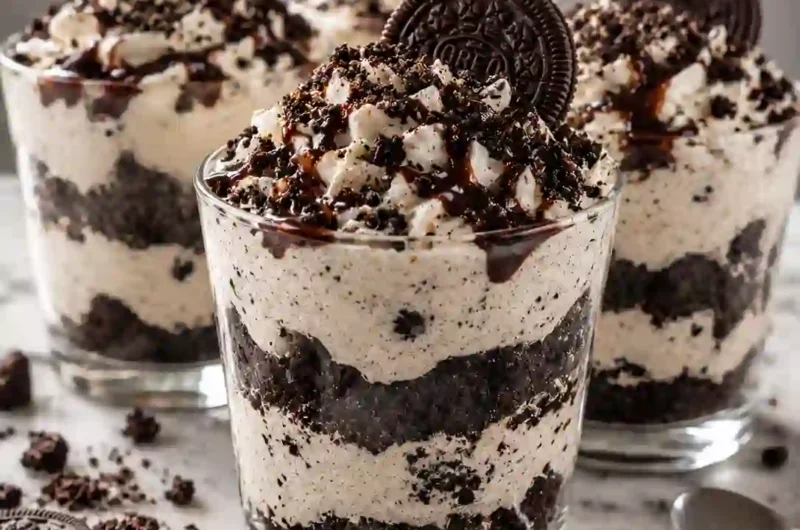
Place the cheesecake cups into the refrigerator for at least 2 to 3 hours. During this time, the filling becomes thicker, colder, and extra creamy.
When ready to serve, the dessert should feel soft, creamy, chilled, and perfectly balanced with crunchy Oreo texture in every bite.
Pro Tips
- Always use room temperature cream cheese because cold cream cheese creates lumpy filling.
- Chill the mixing bowl before whipping cream for faster fluffy texture.
- Crush some Oreos finely and keep some chunky for better texture variety.
- Fold the whipped cream gently to keep the filling light and airy.
- Use clear cups so the beautiful cheesecake layers are easy to see.
- Add a pinch of salt to balance sweetness and improve flavor.
- Chill the dessert overnight if possible because the texture becomes even creamier.
- Use homemade whipped cream for fresher flavor and better texture.
- Pipe the filling into cups for cleaner layers and less mess.
- Add toppings right before serving so the cookies stay crunchy.
Common Mistakes To Avoid
- Using cold cream cheese creates lumps in the filling.
- Skipping the chilling step makes the cheesecake soft and runny.
- Overmixing whipped cream can turn it grainy.
- Adding too much butter makes the crust greasy.
- Crushing all Oreos too finely removes crunchy texture.
- Filling cups too quickly can create messy uneven layers.
- Using warm whipped cream prevents proper thick texture.
- Forgetting to soften cream cheese makes mixing harder.
- Adding toppings too early can make cookies soggy.
- Using too much powdered sugar can overpower the Oreo flavor.
- Not measuring ingredients properly affects texture balance.
- Overfilling the cups can make them difficult to serve neatly.
Variations And Customization Ideas
Now let’s make it even better…
- Make a high-protein version using Greek yogurt and protein powder.
- Create a vegan version using dairy-free cream cheese and coconut whipped cream.
- Add peanut butter for rich chocolate-peanut butter flavor.
- Use golden Oreos for a vanilla cookies-and-cream twist.
- Add fresh strawberries or bananas between layers.
- Mix mini chocolate chips into the filling for extra crunch.
- Turn the recipe into one large no-bake cheesecake instead of cups.
- Add espresso powder for mocha Oreo cheesecake flavor.
- Use caramel drizzle instead of chocolate syrup for sweeter flavor.
- Make mini party cups for birthdays and gatherings.
Serving Ideas
Serve these Oreo cheesecake cups cold straight from the refrigerator for the best creamy texture.
They taste amazing with cold milk, hot coffee, iced coffee, or chocolate milkshakes.
For parties, decorate the tops with mini Oreos, whipped cream swirls, or chocolate drizzle to make them look bakery-style.
Some people even freeze the cups for a short time to create a thicker ice-cream-like texture during summer.
Storage And Reheating
Store the cheesecake cups covered in the refrigerator for up to 4 days.
Keep them in airtight containers so the filling stays fresh and creamy.
These desserts do not need reheating because they are meant to be served cold.
If freezing, wrap tightly and freeze for up to 1 month. Let them thaw in the refrigerator before serving.
Nutrition Facts
Approximate per serving:
- Calories: 320
- Carbohydrates: 28g
- Protein: 4g
- Fat: 21g
- Sugar: 20g
- Fiber: 1g
Quick Summary
- Easy no-bake Oreo dessert cups
- Creamy cheesecake filling with crunchy Oreo layers
- Perfect for parties and cravings
- Beginner-friendly recipe
- No oven needed
- Easy to customize with toppings and flavors
- Rich, cold, creamy, and delicious
When To Eat This
These Oreo No-Bake Cheesecake Cups fit almost every dessert moment.
Make them during hot summer days when you do not want to use the oven. Enjoy them after dinner when sweet cravings hit hard. They are also perfect for birthday parties, family gatherings, movie nights, holiday desserts, and weekend treats.
Some people even enjoy one straight from the fridge late at night because the cold creamy texture feels extra comforting.
These Oreo No-Bake Cheesecake Cups Are Dangerously Easy to Make
Course: Cakes4
servings30
minutes40
minutes300
kcalIngredients
24 Oreo cookies crushed into crumbs for the layers and topping.
2 tablespoons melted butter to help the Oreo crumbs hold together.
8 ounces cream cheese softened at room temperature for smooth filling.
1 cup heavy whipping cream cold for fluffy texture.
1/2 cup powdered sugar for sweetness and smooth texture.
1 teaspoon vanilla extract for warm dessert flavor.
1 cup whipped topping or homemade whipped cream.
Extra Oreo cookies for decorating the top.
Chocolate syrup optional for extra richness.
Mini chocolate chips optional for added crunch.
Directions
- Prepare the Oreo Crust Layer
Start by crushing the Oreo cookies into fine crumbs. You can use a food processor or place the cookies into a zip bag and crush them with a rolling pin. The crumbs should look soft and slightly sandy with small cookie pieces still visible.
Place the crushed Oreos into a bowl and pour in the melted butter. Stir everything together until the crumbs look slightly wet and hold together when pressed with a spoon.
Scoop a few spoonfuls of the Oreo mixture into the bottom of each dessert cup. Press the crumbs down gently using the back of a spoon. This creates the crunchy cookie base layer.
The buttery Oreo crust gives the cheesecake cups amazing texture and helps balance the creamy filling later.
Set the cups aside while you prepare the cheesecake mixture. - Make the Creamy Cheesecake Filling
In a large mixing bowl, beat the softened cream cheese until completely smooth and creamy. This step is important because lumps can ruin the texture later.
Add the powdered sugar and vanilla extract. Continue mixing until the filling becomes thick, soft, and silky smooth.
In a separate bowl, whip the cold heavy cream until fluffy peaks form. The whipped cream should look light, airy, and creamy.
Slowly fold the whipped cream into the cream cheese mixture using a spatula. Do not stir too hard because you want the filling to stay fluffy and soft.
Now crush a few extra Oreo cookies into chunky pieces and gently fold them into the cheesecake filling.
The mixture should now look creamy, thick, and packed with little Oreo pieces.
This small trick makes a huge difference…
Chill the filling for 10 minutes before layering. This helps create cleaner and thicker cheesecake layers. - Layer and Chill the Cheesecake Cups
Spoon the cheesecake filling into each dessert cup over the Oreo crust layer. You can also use a piping bag for cleaner layers and prettier presentation.
Add another small layer of Oreo crumbs in the middle if you want extra crunch and flavor. Then top with more cheesecake filling.
Smooth the tops gently with the back of a spoon. Sprinkle crushed Oreo crumbs, mini chocolate chips, or extra cookie pieces on top.
For a bakery-style look, drizzle chocolate syrup across the tops before chilling.
Place the cheesecake cups into the refrigerator for at least 2 to 3 hours. During this time, the filling becomes thicker, colder, and extra creamy.
When ready to serve, the dessert should feel soft, creamy, chilled, and perfectly balanced with crunchy Oreo texture in every bite.
Notes
- Chill the mixing bowl before whipping cream for faster fluffy texture.
- Fold the whipped cream gently to keep the filling light and airy.