You want something sweet. But not something hard to make.
Maybe you’re tired… or just don’t feel like baking a full cake.
You still want that soft, creamy, bakery-style dessert, right?
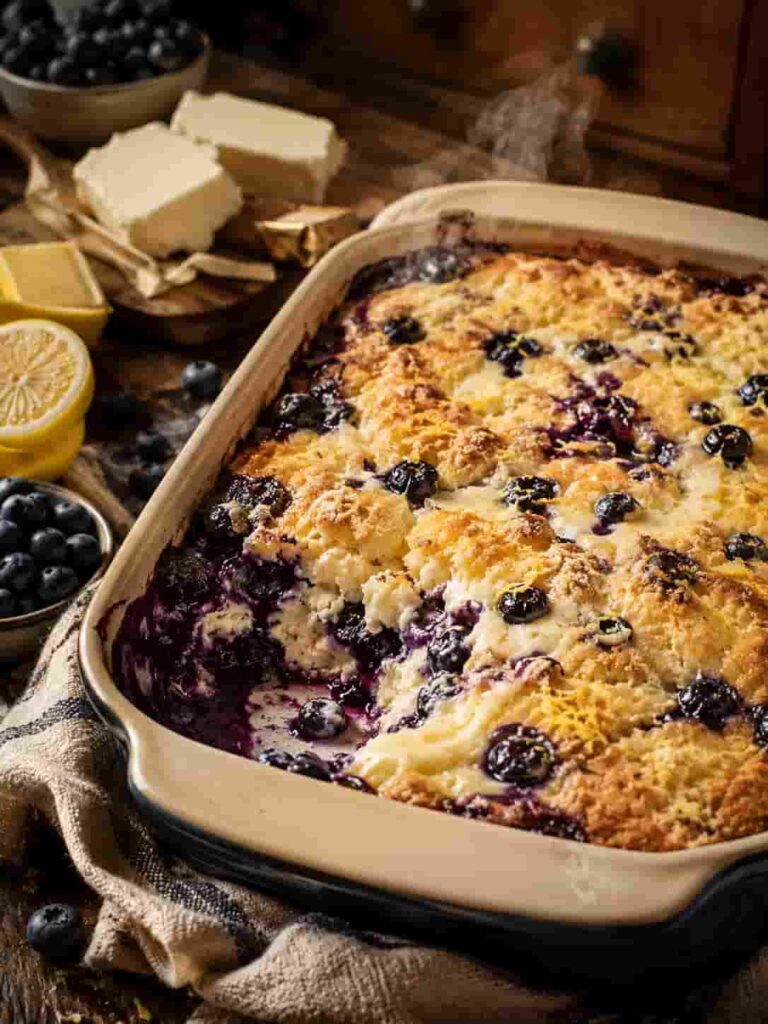
This lemon blueberry cheesecake dump cake is your answer.
No mixing bowls. No stress. Just simple layers and a golden, creamy result that feels like a treat from your favorite bakery.
WHAT IS THIS RECIPE?
This is a super easy dessert where you “dump” ingredients into a dish and bake.
It has layers of juicy blueberries, tangy lemon, creamy cheesecake, and a soft buttery topping.
It’s not a regular cake. It’s softer, creamier, and more comforting.
Each bite is sweet, slightly tangy, and full of flavor.
WHY YOU WILL LOVE THIS RECIPE
- No mixing required — just layer and bake
- Saves time — ready with minimal effort
- Budget-friendly ingredients
- Soft, creamy, and rich texture
- Perfect balance of sweet and tangy
- Great for beginners
- Works for parties or quick cravings
Here’s where most people get this wrong… They don’t layer properly, and the texture turns uneven. Keep reading—you’ll get it perfect.
INGREDIENTS
- 1 can (21 oz) blueberry pie filling — gives sweetness and juicy texture. You can use fresh berries with sugar if needed.
- 1 box lemon cake mix — forms the soft, golden topping. Any brand works.
- 8 oz cream cheese (softened) — creates the creamy cheesecake layer. Make sure it’s soft for smooth texture.
- ½ cup sugar — adds sweetness to the cheesecake layer.
- 1 teaspoon vanilla extract — adds warmth and flavor depth.
- ½ cup unsalted butter (melted) — gives richness and helps create a crispy golden top.
- 1 tablespoon lemon zest — boosts fresh lemon flavor.
- ¼ cup lemon juice — adds tangy balance.
Tip: If you like extra creaminess, you can add a little more cream cheese.
HOW TO MAKE (STEP-BY-STEP)
1. Prepare your baking dish
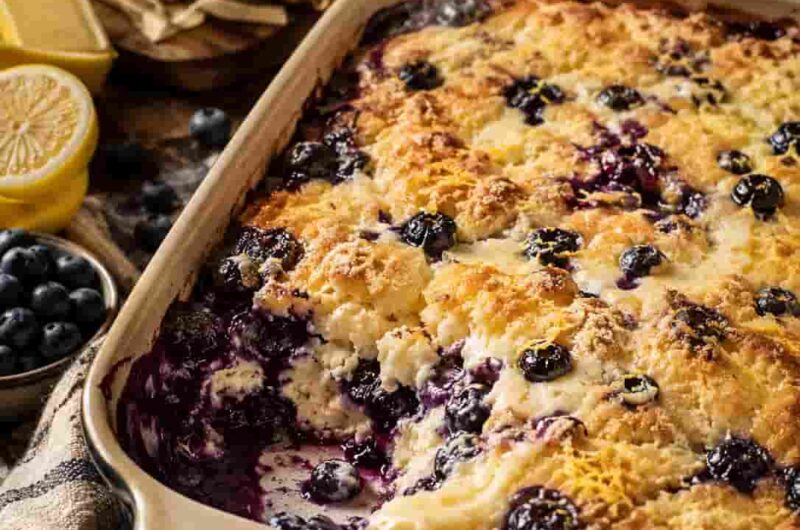
Start by preheating your oven to 180°C (350°F). This helps the dessert bake evenly from the start. Take a baking dish and lightly grease it with butter or oil. This prevents sticking and helps easy serving later. Spread the blueberry pie filling evenly at the bottom. Make sure it covers all corners so every bite has fruit. The layer should look thick, glossy, and juicy. This base creates the soft, sweet foundation. Don’t rush this step—it sets the whole texture of your dessert.
2. Make the cheesecake layer
In a bowl, mix softened cream cheese, sugar, vanilla extract, lemon juice, and lemon zest. Use a spoon or whisk until smooth and creamy. The mixture should feel thick but spreadable. No lumps should remain. This layer adds richness and balances the sweetness. Gently spread this mixture over the blueberry layer. Don’t press too hard. Let it sit softly on top. You should see a smooth, creamy layer forming. This is where the magic starts.
3. Add the cake mix
Now take your dry lemon cake mix and sprinkle it evenly over the cheesecake layer. Do not mix. Just spread it gently so it covers the surface. Make sure there are no big gaps. This layer will bake into a soft, slightly crisp topping. It may look dry now, but don’t worry. It will transform in the oven. Keep the layer even for the best texture.
4. Add butter and bake
Pour melted butter slowly over the cake mix. Try to cover as much surface as possible. This helps create a golden, slightly crispy top. Place the dish in the oven and bake for 40–50 minutes. The top should turn golden brown and slightly crisp. The edges may bubble, and the center will look soft and creamy. This small trick makes a huge difference… spread butter evenly for the best crust.
5. Cool and serve
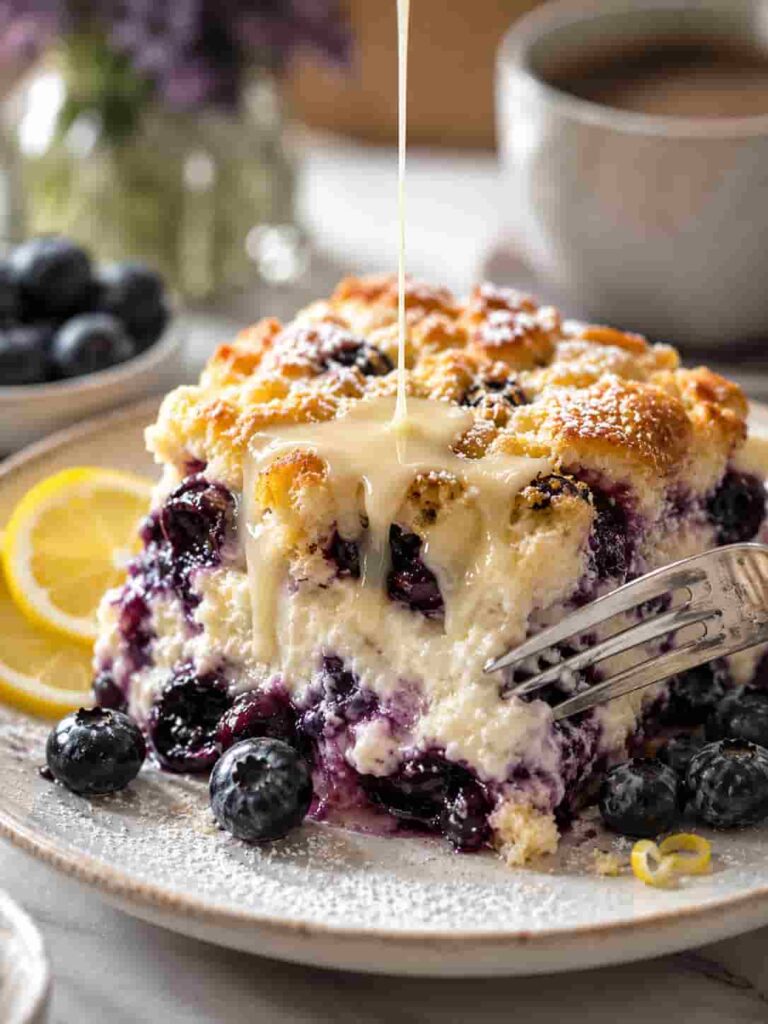
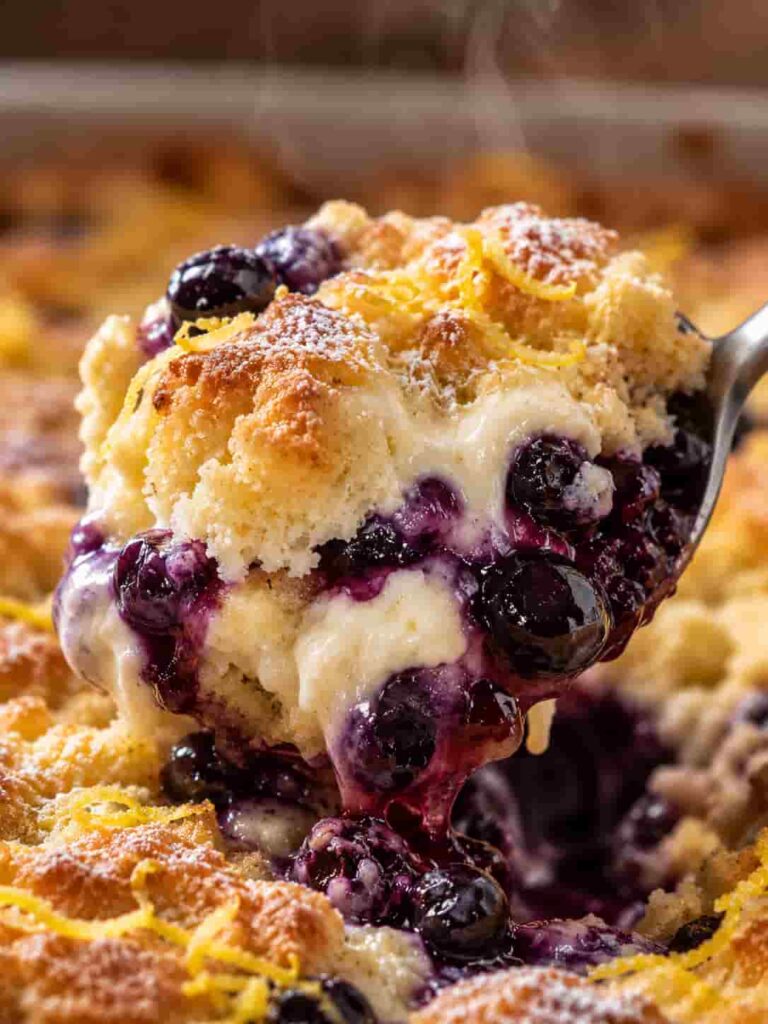
Remove from the oven and let it cool for at least 15 minutes. This helps the layers set properly. When ready, scoop and serve warm. The texture should be soft, creamy, and slightly crisp on top. The smell will be sweet, lemony, and comforting. You’ll want to dig in right away!
PRO TIPS
- Always soften cream cheese before mixing. It helps avoid lumps and gives a smooth layer.
- Spread layers gently to keep texture light and even.
- Use real lemon zest for stronger flavor.
- Don’t overbake — it can dry out the cake layer.
- Check edges for bubbling to know it’s ready.
- Let it rest before serving for better texture.
- Add extra butter if you like a richer crust.
- Use fresh blueberries for a more natural taste.
- Keep layers even for balanced bites.
COMMON MISTAKES TO AVOID
Using cold cream cheese creates lumps and uneven texture. Skipping lemon zest reduces flavor. Not spreading butter evenly leads to dry patches. Overbaking makes the dessert hard instead of soft. Underbaking leaves the center too runny. Mixing the layers ruins the dump cake style. Using too little fruit makes it dry. Not greasing the pan causes sticking. Adding too much sugar makes it overly sweet. Cutting too early makes it messy.
VARIATIONS / CUSTOMIZATION IDEAS
Make a high-protein version by adding Greek yogurt to the cheesecake layer. For vegan, use dairy-free cream cheese and butter. Try a quick version with store-bought lemon curd. Add strawberries or raspberries for a twist. Use vanilla cake mix instead of lemon for a milder flavor. Add white chocolate chips for richness.
Now let’s make it even better… Add a light glaze on top for extra sweetness.
SERVING IDEAS
Serve warm with a scoop of ice cream. Enjoy with tea or coffee. Add whipped cream for extra softness. Perfect for parties or family dessert nights.
STORAGE & REHEATING
Store in fridge for up to 5 days. Cover tightly. Reheat in microwave for 20–30 seconds. Freeze for up to 2 months. Thaw overnight before reheating.
NUTRITION FACTS (Approx per serving)
Calories: 320 Carbs: 45g Fat: 14g Protein: 4g Sugar: 28g
QUICK SUMMARY
- Easy dump-and-bake dessert
- Creamy cheesecake layer
- Sweet blueberry base
- Soft and golden topping
- Perfect for beginners
WHEN TO EAT THIS
Perfect for busy days when you want something quick.
Great for after-dinner dessert.
Perfect for snack cravings.
Even late at night when you want comfort food.
One simple recipe… endless cozy moments.
Lemon Blueberry Cheesecake Dump Cake You Can’t Mess Up
Course: Cakes4
servings30
minutes40
minutes300
kcalIngredients
1 can (21 oz) blueberry pie filling — gives sweetness and juicy texture. You can use fresh berries with sugar if needed.
1 box lemon cake mix — forms the soft, golden topping. Any brand works.
8 oz cream cheese (softened) — creates the creamy cheesecake layer. Make sure it’s soft for smooth texture.
½ cup sugar — adds sweetness to the cheesecake layer.
1 teaspoon vanilla extract — adds warmth and flavor depth.
½ cup unsalted butter (melted) — gives richness and helps create a crispy golden top.
1 tablespoon lemon zest — boosts fresh lemon flavor.
¼ cup lemon juice — adds tangy balance.
Directions
- Prepare your baking dish
Start by preheating your oven to 180°C (350°F). This helps the dessert bake evenly from the start. Take a baking dish and lightly grease it with butter or oil. This prevents sticking and helps easy serving later. Spread the blueberry pie filling evenly at the bottom. Make sure it covers all corners so every bite has fruit. The layer should look thick, glossy, and juicy. This base creates the soft, sweet foundation. Don’t rush this step—it sets the whole texture of your dessert. - Make the cheesecake layer
In a bowl, mix softened cream cheese, sugar, vanilla extract, lemon juice, and lemon zest. Use a spoon or whisk until smooth and creamy. The mixture should feel thick but spreadable. No lumps should remain. This layer adds richness and balances the sweetness. Gently spread this mixture over the blueberry layer. Don’t press too hard. Let it sit softly on top. You should see a smooth, creamy layer forming. This is where the magic starts. - Add the cake mix
Now take your dry lemon cake mix and sprinkle it evenly over the cheesecake layer. Do not mix. Just spread it gently so it covers the surface. Make sure there are no big gaps. This layer will bake into a soft, slightly crisp topping. It may look dry now, but don’t worry. It will transform in the oven. Keep the layer even for the best texture. - Add butter and bake
Pour melted butter slowly over the cake mix. Try to cover as much surface as possible. This helps create a golden, slightly crispy top. Place the dish in the oven and bake for 40–50 minutes. The top should turn golden brown and slightly crisp. The edges may bubble, and the center will look soft and creamy. This small trick makes a huge difference… spread butter evenly for the best crust. - Cool and serve
Remove from the oven and let it cool for at least 15 minutes. This helps the layers set properly. When ready, scoop and serve warm. The texture should be soft, creamy, and slightly crisp on top. The smell will be sweet, lemony, and comforting. You’ll want to dig in right away!
Notes
- Always soften cream cheese before mixing. It helps avoid lumps and gives a smooth layer.
- Don’t overbake — it can dry out the cake layer.