Have you ever wanted a dessert that looks impressive but feels easy enough to make at home? That is exactly why people fall in love with Italian Love Cake.
This cake has everything you crave in one dessert. Soft chocolate cake. Creamy ricotta filling. Smooth fluffy topping. Every layer tastes rich, comforting, and completely irresistible.
And here is the best part…
You do not need fancy baking skills to make it look bakery-perfect.
This recipe is simple enough for beginners but special enough for birthdays, holidays, potlucks, and family gatherings. Once sliced, the beautiful layers surprise everyone at the table.
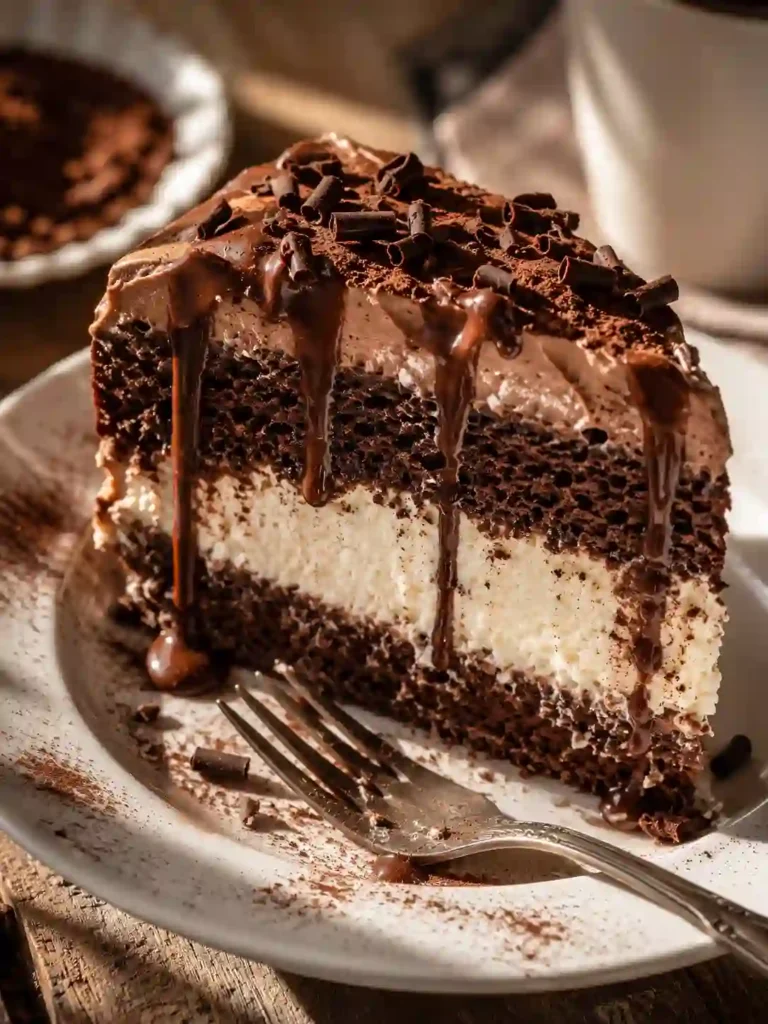
One bite feels soft, creamy, chocolatey, and melt-in-your-mouth delicious all at the same time.
Honestly?
This is the kind of dessert people remember long after dinner is over.
What Is This Recipe?
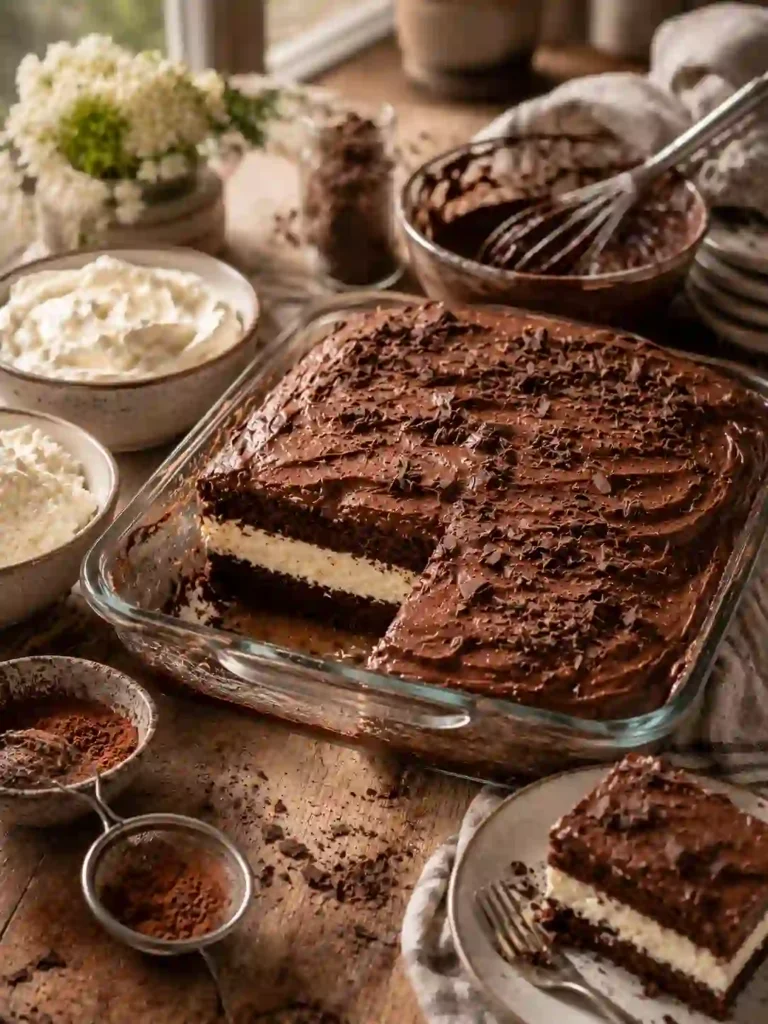
Italian Love Cake is a layered dessert made with chocolate cake batter and a creamy ricotta cheese mixture baked together in one pan.
During baking, something magical happens. The ricotta layer sinks while the cake rises around it, creating beautiful creamy layers without extra work.
After cooling, the cake is topped with fluffy chocolate pudding frosting that makes every bite even richer and smoother.
The final dessert tastes like a mix between cheesecake, chocolate cake, and creamy mousse all in one slice.
That is exactly why so many people call it “love cake.”
Why You Will Love This Recipe
- Easy layered dessert
The layers form naturally while baking, so you do not need complicated decorating skills. - Rich and creamy flavor
You get chocolate cake, cheesecake texture, and fluffy pudding topping in every bite. - Perfect for parties
This cake feeds a crowd and looks beautiful sliced on dessert tables. - Budget-friendly ingredients
Most ingredients are affordable and easy to find in regular grocery stores. - Make-ahead friendly
The cake tastes even better after chilling overnight in the refrigerator. - Soft and moist texture
Every layer stays creamy, smooth, and tender for days. - Beginner-friendly recipe
Even first-time bakers can make this dessert successfully. - Great for holidays
It feels elegant enough for Christmas, birthdays, Easter, and family dinners.
Here’s where most people get this wrong…
They skip chilling the cake long enough, and the layers never fully set properly.
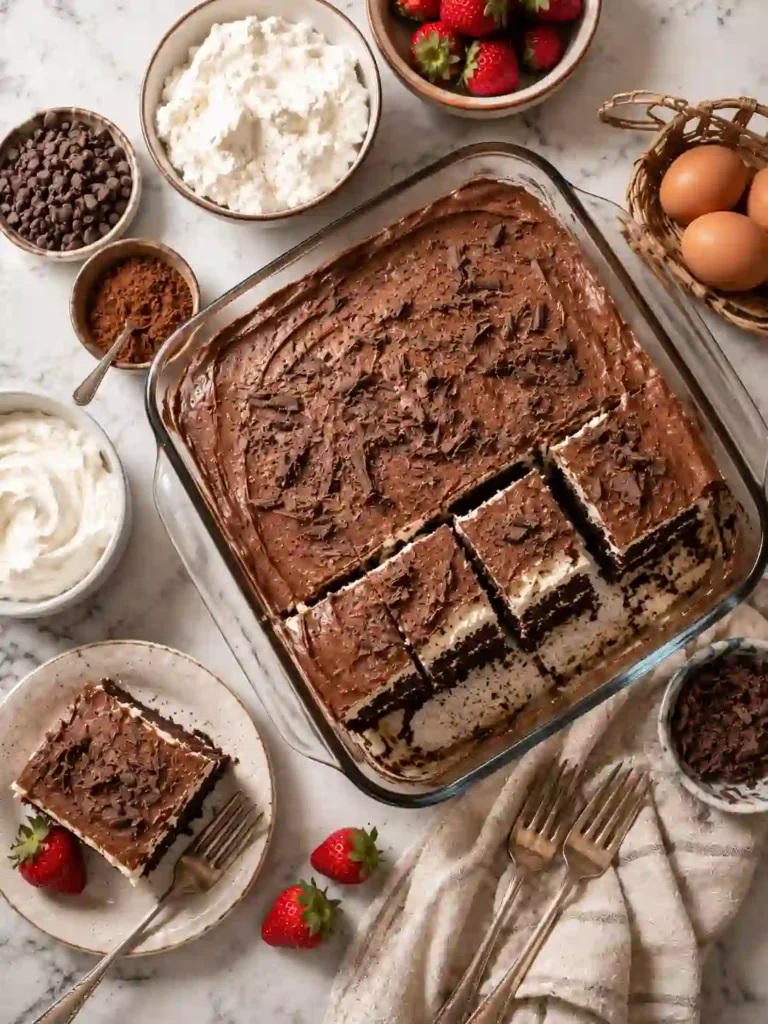
Ingredients
- 1 box chocolate cake mix
This creates the soft chocolate base quickly and easily. Devil’s food cake mix works especially well for rich flavor. - Ingredients listed on the cake mix box
Usually eggs, oil, and water. Follow the box instructions carefully for best texture. - 2 pounds ricotta cheese
Whole milk ricotta gives the creamiest filling and richer flavor. - 4 large eggs
Helps bind the ricotta layer while creating smooth texture. - ¾ cup granulated sugar
Adds sweetness to balance the creamy cheese filling. - 1 teaspoon vanilla extract
Gives warm bakery-style flavor that makes the dessert taste homemade. - 1 small box instant chocolate pudding mix
Creates the fluffy chocolate topping layer. - 1 cup cold milk
Helps the pudding become smooth and thick. - 1 container whipped topping
Makes the frosting light, airy, and creamy.
Helpful tip:
Drain watery ricotta slightly before using so the filling stays thick and creamy instead of runny.
How To Make Italian Love Cake
Step 1: Prepare the Cake Batter and Ricotta Mixture
Start by preheating your oven to 350°F and greasing a large baking dish well. Prepare the chocolate cake batter according to the package directions using the eggs, oil, and water listed on the box. The batter should look smooth, glossy, and rich chocolate brown. Pour the cake batter evenly into the baking dish and spread gently into the corners. In another bowl, mix the ricotta cheese, eggs, sugar, and vanilla extract until smooth and creamy. The mixture should feel thick but silky without large lumps. Carefully spoon the ricotta mixture over the chocolate batter in large sections. Do not mix the layers together because they shift naturally during baking. This already looks unusual, but trust the process because the layers magically switch places in the oven.
Step 2: Bake Until Soft and Set
Place the baking dish carefully into the oven and bake for about 1 hour. As the cake bakes, the chocolate layer rises while the ricotta layer slowly sinks underneath. This small trick makes a huge difference because it creates the beautiful layered effect automatically. The top should look slightly golden around the edges while the center feels mostly firm. The kitchen will smell warm, chocolatey, sweet, and comforting during baking. If the center jiggles too much, bake for a few extra minutes. Remove the cake carefully and let it cool completely at room temperature. The layers continue setting while cooling. Do not rush this step because warm cake can melt the topping later and ruin the texture.
Step 3: Make the Chocolate Topping
In a medium bowl, whisk together the instant chocolate pudding mix and cold milk until smooth and thick. The pudding should become creamy after a few minutes of whisking. Gently fold in the whipped topping until light, fluffy, and evenly combined. The mixture should look silky, airy, and soft like chocolate mousse. Spread this topping carefully across the cooled cake using a spatula. Try to cover every corner evenly for a smooth bakery-style finish. The fluffy topping adds richness while balancing the dense creamy layers underneath. Sprinkle chocolate shavings or cocoa powder on top if desired. At this stage, the cake already looks beautiful and tempting enough for any celebration table.
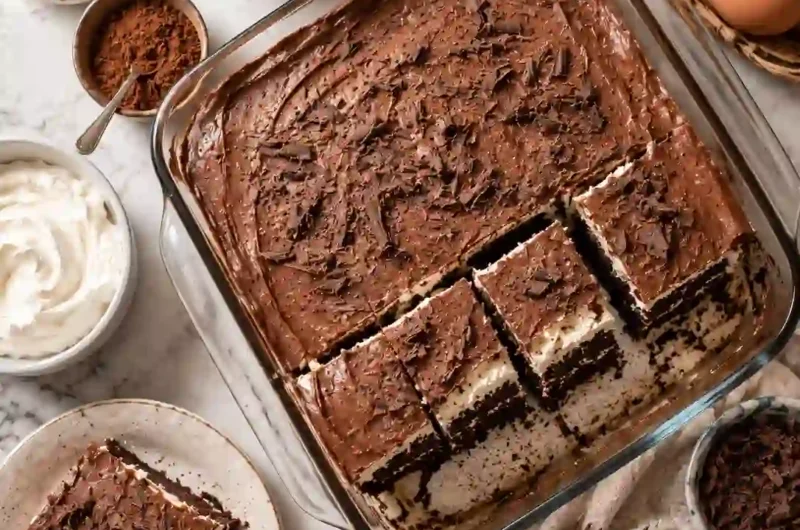
Step 4: Chill and Serve
Cover the cake and refrigerate for at least 4 hours, though overnight works even better. Chilling helps the layers firm up while blending the flavors together perfectly. When sliced cold, you should see the creamy ricotta layer sitting beautifully beneath the soft chocolate cake. The topping becomes extra fluffy and smooth after chilling. Use a clean sharp knife for neat slices and wipe the knife between cuts. Every bite should taste rich, creamy, chocolatey, and slightly cheesecake-like all at once. Serve cold for the best texture and flavor. The longer it chills, the more delicious it becomes the next day.
Pro Tips
- Use whole milk ricotta because low-fat ricotta can become watery and less creamy.
- Chill the cake overnight for cleaner slices and richer blended flavor.
- Let the cake cool completely before adding topping so the frosting stays fluffy.
- Use high-quality chocolate pudding mix for deeper chocolate flavor.
- Drain excess liquid from ricotta cheese for thicker creamy layers.
- Wipe the knife between slices for bakery-style presentation.
- Add chocolate curls on top for elegant decoration with little effort.
- Avoid overmixing the ricotta filling because too much air can affect texture.
- Use glass baking dishes for easier serving and beautiful layer visibility.
- Store the cake cold because the creamy layers taste best chilled.
Common Mistakes To Avoid
- Skipping cooling time can melt the topping completely.
- Using watery ricotta creates loose messy layers.
- Overbaking dries the chocolate cake layer quickly.
- Mixing the layers together ruins the natural layered effect.
- Using warm milk for pudding prevents proper thickening.
- Adding topping too early makes the frosting slide around.
- Not greasing the pan properly can make slices stick badly.
- Using expired pudding mix weakens texture and flavor.
- Cutting the cake before chilling causes messy slices.
- Overmixing the cake batter may create dense texture.
- Storing uncovered cake dries the topping quickly.
- Freezing without wrapping properly can damage texture and flavor.
Variations & Customization Ideas
Strawberry Love Cake
Use strawberry cake mix and vanilla pudding for a fruity version.
High Protein Version
Add Greek yogurt into the ricotta layer for extra protein and creaminess.
Mocha Flavor
Mix instant coffee into the chocolate pudding for rich café-style flavor.
Vanilla Love Cake
Use vanilla cake mix and vanilla pudding for a lighter sweeter version.
Quick Shortcut Version
Use store-bought whipped frosting if you want even faster preparation.
Holiday Style
Top with crushed peppermint, berries, or chocolate curls for festive decoration.
Now let’s make it even better…
Try adding mini chocolate chips inside the ricotta layer for extra surprise texture.
Serving Ideas
- Serve cold after family dinners.
- Pair with hot coffee or cappuccino.
- Add fresh strawberries for color and freshness.
- Serve during birthdays and holidays.
- Enjoy as a late-night sweet treat.
- Add chocolate syrup for extra richness.
Storage & Reheating
Store the cake covered in the refrigerator for up to 5 days.
Keep it chilled because the creamy ricotta layer tastes best cold.
You can freeze slices individually for up to 2 months. Wrap tightly before freezing.
This cake is best served chilled, so reheating is usually not needed.
Nutrition Facts (Approximate Per Slice)
- Calories: 420
- Carbohydrates: 38g
- Protein: 9g
- Fat: 24g
- Sugar: 28g
- Fiber: 2g
Quick Summary
- Easy layered Italian dessert
- Rich chocolate and creamy ricotta flavor
- Perfect for holidays and parties
- Beginner-friendly recipe
- Best served chilled
- Soft, creamy, and bakery-style delicious
When To Eat This
Italian Love Cake fits almost every dessert craving moment.
It works perfectly for birthdays, family dinners, holidays, potlucks, and romantic date nights. It also feels comforting after a long stressful day when you want something rich and satisfying.
Need a late-night dessert?
A cold creamy slice feels incredibly comforting.
Want an easy holiday dessert?
This cake looks impressive without complicated decorating.
The Creamiest Italian Love Cake Everyone Will Ask You to Make Again
Course: Cakes4
servings30
minutes40
minutes300
kcalIngredients
1 box chocolate cake mix
This creates the soft chocolate base quickly and easily. Devil’s food cake mix works especially well for rich flavor.Ingredients listed on the cake mix box
Usually eggs, oil, and water. Follow the box instructions carefully for best texture.2 pounds ricotta cheese
Whole milk ricotta gives the creamiest filling and richer flavor.4 large eggs
Helps bind the ricotta layer while creating smooth texture.¾ cup granulated sugar
Adds sweetness to balance the creamy cheese filling.1 teaspoon vanilla extract
Gives warm bakery-style flavor that makes the dessert taste homemade.1 small box instant chocolate pudding mix
Creates the fluffy chocolate topping layer.1 cup cold milk
Helps the pudding become smooth and thick.1 container whipped topping
Makes the frosting light, airy, and creamy.
Directions
- Prepare the Cake Batter and Ricotta Mixture
Start by preheating your oven to 350°F and greasing a large baking dish well. Prepare the chocolate cake batter according to the package directions using the eggs, oil, and water listed on the box. The batter should look smooth, glossy, and rich chocolate brown. Pour the cake batter evenly into the baking dish and spread gently into the corners. In another bowl, mix the ricotta cheese, eggs, sugar, and vanilla extract until smooth and creamy. The mixture should feel thick but silky without large lumps. Carefully spoon the ricotta mixture over the chocolate batter in large sections. Do not mix the layers together because they shift naturally during baking. This already looks unusual, but trust the process because the layers magically switch places in the oven. - Bake Until Soft and Set
Place the baking dish carefully into the oven and bake for about 1 hour. As the cake bakes, the chocolate layer rises while the ricotta layer slowly sinks underneath. This small trick makes a huge difference because it creates the beautiful layered effect automatically. The top should look slightly golden around the edges while the center feels mostly firm. The kitchen will smell warm, chocolatey, sweet, and comforting during baking. If the center jiggles too much, bake for a few extra minutes. Remove the cake carefully and let it cool completely at room temperature. The layers continue setting while cooling. Do not rush this step because warm cake can melt the topping later and ruin the texture - Make the Chocolate Topping
In a medium bowl, whisk together the instant chocolate pudding mix and cold milk until smooth and thick. The pudding should become creamy after a few minutes of whisking. Gently fold in the whipped topping until light, fluffy, and evenly combined. The mixture should look silky, airy, and soft like chocolate mousse. Spread this topping carefully across the cooled cake using a spatula. Try to cover every corner evenly for a smooth bakery-style finish. The fluffy topping adds richness while balancing the dense creamy layers underneath. Sprinkle chocolate shavings or cocoa powder on top if desired. At this stage, the cake already looks beautiful and tempting enough for any celebration table. - Chill and Serve
Cover the cake and refrigerate for at least 4 hours, though overnight works even better. Chilling helps the layers firm up while blending the flavors together perfectly. When sliced cold, you should see the creamy ricotta layer sitting beautifully beneath the soft chocolate cake. The topping becomes extra fluffy and smooth after chilling. Use a clean sharp knife for neat slices and wipe the knife between cuts. Every bite should taste rich, creamy, chocolatey, and slightly cheesecake-like all at once. Serve cold for the best texture and flavor. The longer it chills, the more delicious it becomes the next day.
Notes
- Use whole milk ricotta because low-fat ricotta can become watery and less creamy.
- Chill the cake overnight for cleaner slices and richer blended flavor.