

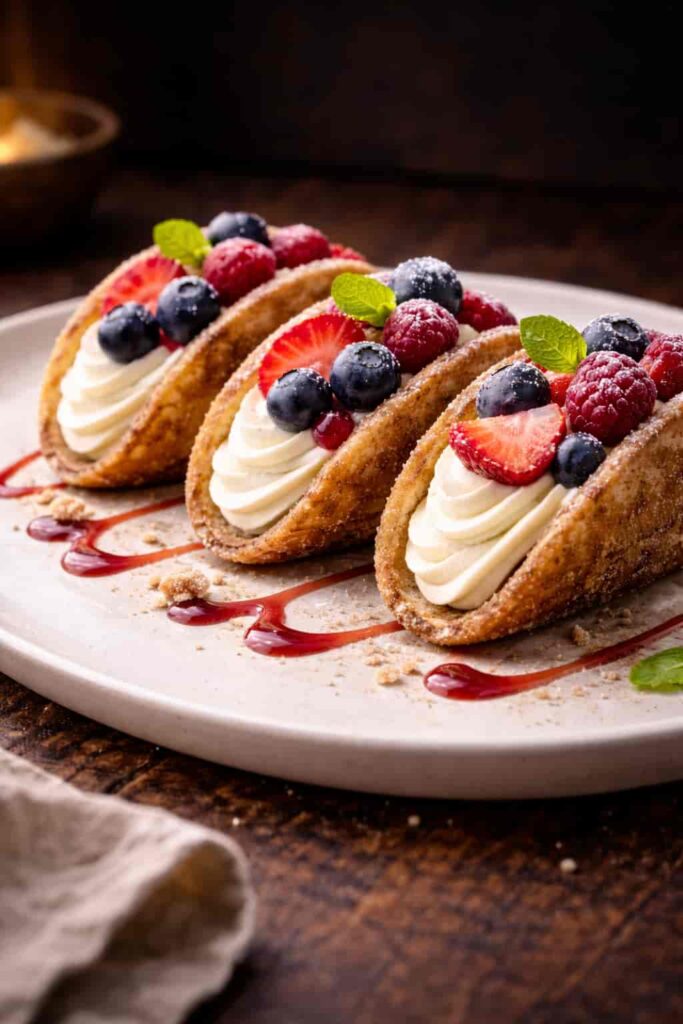
Berrylicious Cheesecake Tacos are a creative and modern dessert that combines the creamy richness of cheesecake with the fun, handheld shape of tacos.
Instead of traditional savory fillings, these tacos are filled with a smooth, sweet cheesecake mixture and topped with fresh, juicy berries such as strawberries, blueberries, or raspberries. The taco shells are usually made from baked cookie dough, waffle cones, or pastry shells, giving them a crisp and slightly sweet crunch.
This dessert is known for its beautiful presentation and refreshing taste. The creamy filling pairs perfectly with the tartness of the berries, creating a balanced flavor in every bite.
Berrylicious Cheesecake Tacos are often served chilled, making them a perfect treat for warm days, parties, or special occasions. They are fun to assemble, visually appealing, and loved by both kids and adults who enjoy fruity, creamy desserts with a playful twist.
Why I Love This Recipe
I love Berrylicious Cheesecake Tacos because they are fun, colorful, and incredibly delicious. The combination of creamy cheesecake filling with fresh, juicy berries creates a perfect balance of sweetness and freshness. The crispy taco shells add a delightful crunch, making every bite exciting. They are easy to assemble, visually stunning, and always a crowd-pleasing dessert for any occasion.
Ingredients for Berrylicious Cheesecake Tacos
- Taco Shells (Cookie or Pastry Shells): Provide a crisp and slightly sweet base that holds the filling and adds a satisfying crunch to every bite.
- Cream Cheese: The main ingredient for the filling, offering a rich, creamy, and slightly tangy flavor that defines the dessert.
- Whipping Cream: Adds lightness and airy texture to the cheesecake filling, making it smooth and fluffy.
- Powdered Sugar: Sweetens the filling while ensuring a smooth consistency without graininess.
- Vanilla Extract: Enhances the overall flavor with a warm and aromatic touch.
- Fresh Strawberries: Add natural sweetness, juiciness, and vibrant color to the tacos.
- Blueberries: Provide a slight tartness that balances the creamy filling.
- Raspberries (Optional): Add a tangy flavor and extra freshness.
- Chocolate Drizzle (Optional): Adds richness and decorative appeal for a more indulgent dessert experience.
Kitchen Tools You’ll Need
- Mixing bowls for preparing cheesecake filling
- Electric mixer or whisk for smooth, fluffy cream
- Spatula for folding ingredients gently
- Baking tray for shaping and baking taco shells
- Measuring cups and spoons for accuracy
- Knife for slicing fresh berries neatly
- Cooling rack for taco shells to crisp properly
- Piping bag for easy and clean filling application
How to Make Berrylicious Cheesecake Tacos
- Step 1: Prepare the Taco Shells
Start by preheating the oven and shaping cookie or pastry dough into taco molds or draped over an inverted muffin tray. Bake until golden and crisp. Allow them to cool completely so they hold their shape and stay crunchy. - Step 2: Make the Cheesecake Filling
In a mixing bowl, beat cream cheese until smooth. Add powdered sugar and vanilla extract, mixing until well combined. In a separate bowl, whip the cream until soft peaks form, then gently fold it into the cream cheese mixture for a light and fluffy texture. - Step 3: Prepare the Berries
Wash and dry strawberries, blueberries, and raspberries. Slice strawberries into small pieces for easy filling. Keep the berries fresh and chilled for best flavor and presentation. - Step 4: Fill the Taco Shells
Once the shells are fully cooled, use a spoon or piping bag to fill each taco shell with the cheesecake mixture. Spread evenly for a smooth and creamy base. - Step 5: Add the Berry Topping
Arrange fresh berries generously over the cheesecake filling. Mix different berries for color, texture, and balanced flavor in every bite. - Step 6: Add Optional Drizzle
Drizzle melted chocolate, strawberry sauce, or caramel over the tacos for extra sweetness and decoration. - Step 7: Chill Before Serving
Place the filled tacos in the refrigerator for 20–30 minutes. This helps the filling set and enhances the refreshing taste. - Step 8: Serve Fresh
Serve chilled for the best experience. Enjoy the combination of crispy shells, creamy filling, and juicy berries in every bite.
Tips for Perfect Berrylicious Cheesecake Tacos
- Use fully cooled taco shells to keep them crispy and firm
- Whip cream properly to achieve a light and airy filling
- Do not overmix the cheesecake mixture to maintain smooth texture
- Add berries just before serving to keep them fresh
- Chill assembled tacos briefly for better flavor and structure
- Use fresh, ripe berries for best taste and presentation
Preparation Time
- Preparation Time: 25–30 minutes, including mixing cheesecake filling, preparing berries, and shaping taco shells
- Baking Time: 10–12 minutes for taco shells until golden and crisp
- Cooling Time: 15–20 minutes for shells to cool completely before filling
- Total Preparation Time: Approximately 50–60 minutes depending on baking speed and kitchen setup
Nutrition Facts
- Calories: Around 180–250 per taco depending on toppings and shell type
- Carbohydrates: Mainly from taco shells, sugar, and berries
- Protein: Provided by cream cheese and whipping cream
- Fat: Comes from cream cheese and dairy-based ingredients
- Fiber: Present in fresh berries for better digestion
- Sugar: Balanced sweetness from sugar and natural fruit sugars
- Serving Size: 1–2 tacos per person for a dessert portion
Serving Suggestions
- Serve chilled for the best creamy and refreshing taste experience
- Arrange on a platter for an eye-catching dessert presentation
- Drizzle with chocolate or berry sauce for extra sweetness
- Garnish with mint leaves for a fresh aroma and look
- Pair with iced coffee, milkshakes, or fruit punch for parties
- Serve immediately after assembling for best texture and crunch

Storage Instructions
- Store taco shells separately in an airtight container to maintain crispiness
- Keep cheesecake filling refrigerated for up to 2–3 days
- Assemble tacos only before serving to avoid sogginess
- Store berries in a dry, chilled container for freshness
- Avoid freezing assembled tacos as texture may change
- Keep all components covered to preserve flavor and quality
Recipe Variations and Substitutions
- Use chocolate or vanilla waffle cones instead of taco shells
- Replace cream cheese with mascarpone for a richer taste
- Add kiwi, mango, or banana for mixed fruit flavor
- Use crushed biscuits instead of baked shells for a no-bake version
- Swap sugar with honey or maple syrup for natural sweetness
- Add nut crumbs or granola for extra crunch and texture
Frequently Asked Questions
- Can I make taco shells ahead of time? Yes, store them in an airtight container to keep them crisp.
- Can I prepare filling in advance? Yes, refrigerate for up to 2–3 days.
- Why do tacos get soggy? Filling was added too early or shells weren’t fully cooled.
- Can I use frozen berries? Fresh berries are recommended for best texture and taste.
Final Instructions / Recipe Notes
- Always use fresh ingredients for the best flavor and presentation
- Ensure taco shells are completely cooled before filling
- Assemble just before serving to maintain crispiness
- Do not overfill to avoid breaking the shells
- Chill briefly after assembly for better taste and texture
- Serve immediately for the most enjoyable dessert experience

Delicious Berrylicious Cheesecake Tacos Made with Crispy Shells, Cream Cheese, and Juicy Berries
Course: Dessert4
servings30
minutes40
minutes300
kcalIngredients
Taco Shells (Cookie or Pastry Shells)
Cream Cheese
Whipping Cream
Powdered Sugar
Vanilla Extract
Fresh Strawberries
Blueberries
Raspberries (Optional)
Chocolate Drizzle (Optional)
Directions
- Step 1: Prepare the Taco Shells
Start by preheating the oven and shaping cookie or pastry dough into taco molds or draped over an inverted muffin tray. Bake until golden and crisp. Allow them to cool completely so they hold their shape and stay crunchy. - Step 2: Make the Cheesecake Filling
In a mixing bowl, beat cream cheese until smooth. Add powdered sugar and vanilla extract, mixing until well combined. In a separate bowl, whip the cream until soft peaks form, then gently fold it into the cream cheese mixture for a light and fluffy texture. - Step 3: Prepare the Berries
Wash and dry strawberries, blueberries, and raspberries. Slice strawberries into small pieces for easy filling. Keep the berries fresh and chilled for best flavor and presentation. - Step 4: Fill the Taco Shells
Once the shells are fully cooled, use a spoon or piping bag to fill each taco shell with the cheesecake mixture. Spread evenly for a smooth and creamy base. - Step 5: Add the Berry Topping
Arrange fresh berries generously over the cheesecake filling. Mix different berries for color, texture, and balanced flavor in every bite. - Step 6: Add Optional Drizzle
Drizzle melted chocolate, strawberry sauce, or caramel over the tacos for extra sweetness and decoration. - Step 7: Chill Before Serving
Place the filled tacos in the refrigerator for 20–30 minutes. This helps the filling set and enhances the refreshing taste. - Step 8: Serve Fresh
Serve chilled for the best experience. Enjoy the combination of crispy shells, creamy filling, and juicy berries in every bite.
Notes
- Use fully cooled taco shells to keep them crispy and firm
- Whip cream properly to achieve a light and airy filling
