Have you ever wanted the cozy flavor of campfire s’mores without building a fire or making a sticky mess in your kitchen? That is exactly why these S’mores Cookie Bars are about to become your new favorite dessert. They are soft, chewy, gooey, and packed with melted chocolate and toasted marshmallow goodness in every bite.
The best part?
You get all the classic s’mores flavor in one easy pan dessert that is simple enough for beginners. No campfire. No complicated baking skills. Just rich cookie dough, melted chocolate, crunchy graham crackers, and gooey marshmallows baked together into one irresistible treat.
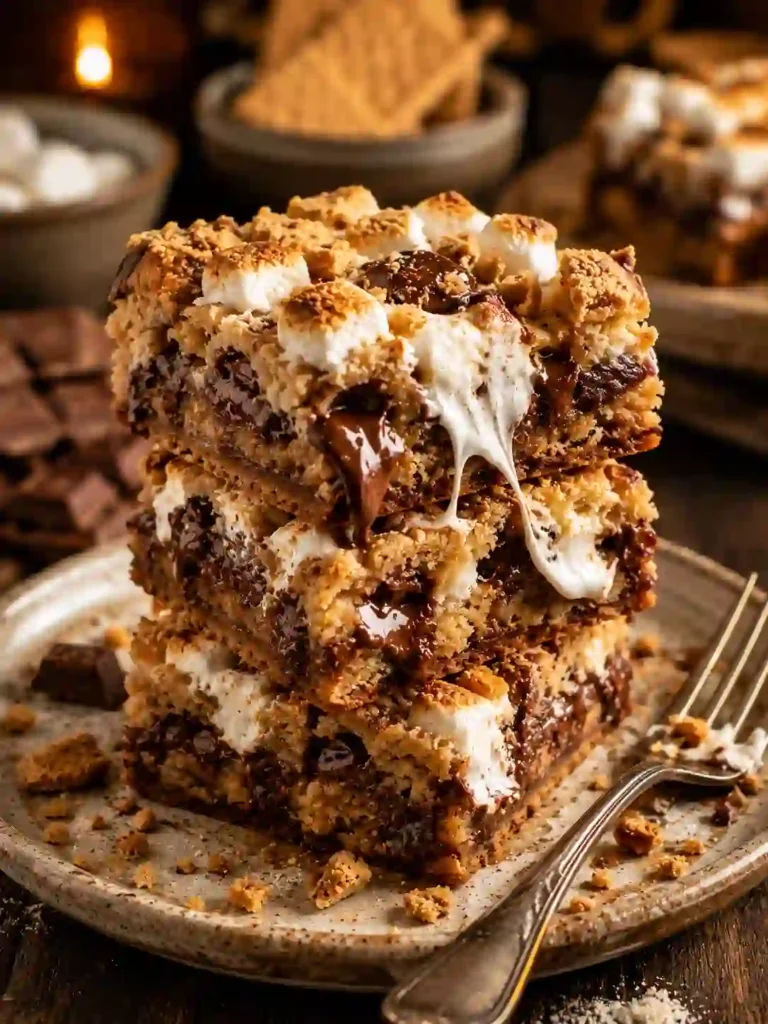
These bars come out golden on top, soft in the center, and slightly crispy around the edges. The warm melted chocolate mixed with marshmallow creates the kind of dessert people keep sneaking bites of straight from the pan.
And honestly?
The smell alone while these bake is enough to make everyone walk into the kitchen.
What Is This Recipe?
S’mores Cookie Bars are soft dessert bars inspired by classic campfire s’mores. Instead of roasting marshmallows outside, everything is baked together in one pan.
The recipe combines chewy cookie dough, graham crackers, chocolate, and marshmallows into thick dessert bars with layers of gooey texture and rich flavor.
What makes these bars special is how easy they are. You do not need special equipment or difficult baking techniques. Everything bakes together into one warm, soft, chocolate-filled dessert.
They are perfect for parties, movie nights, bake sales, holidays, or anytime you want a cozy homemade treat.
Why You Will Love This Recipe
- These bars are faster and easier than making individual cookies.
- The recipe uses simple pantry ingredients you probably already have.
- You get soft cookie texture, melted chocolate, and gooey marshmallow in every bite.
- One pan makes enough dessert for family gatherings or parties.
- The bars stay soft and chewy for several days.
- You do not need fancy baking tools or advanced skills.
- They taste like campfire s’mores without needing outdoor cooking.
- The recipe is budget-friendly and great for feeding a crowd.
- Kids and adults both love the rich chocolate flavor.
- They freeze well for future dessert cravings.
Here’s where most people get this wrong…
They overbake the bars, which turns the centers dry instead of soft and gooey.
Ingredients
- 2 cups all-purpose flour – Gives the bars structure while keeping them soft and chewy.
- 1 teaspoon baking soda – Helps create soft texture and light rise.
- 1/2 teaspoon salt – Balances the sweetness and boosts flavor.
- 3/4 cup unsalted butter, softened – Adds rich buttery flavor and soft texture.
- 3/4 cup brown sugar – Creates chewy texture and caramel flavor.
- 1/2 cup granulated sugar – Helps create lightly crisp golden edges.
- 2 large eggs – Help hold the bars together while keeping them soft.
- 2 teaspoons vanilla extract – Adds warm bakery-style sweetness.
- 1 1/2 cups chocolate chips – Use milk chocolate for classic s’mores flavor or dark chocolate for richer taste.
- 1 1/2 cups mini marshmallows – These melt beautifully and create gooey texture.
- 1 cup crushed graham crackers – Adds crunch and classic s’mores flavor.
- Optional: extra chocolate chunks for topping – Makes the bars look extra rich and bakery-style.
Fresh marshmallows work best because older marshmallows can become dry and chewy during baking.
How to Make S’mores Cookie Bars
1. Prepare the Cookie Dough
Start by preheating your oven to 350°F and lining a baking pan with parchment paper for easy removal later. In a medium bowl, whisk together the flour, baking soda, and salt until evenly mixed. In a larger mixing bowl, beat the softened butter, brown sugar, and granulated sugar together until the mixture becomes pale, creamy, and fluffy. This step helps create soft chewy bars instead of dense ones. Add the eggs one at a time while mixing slowly. Stir in the vanilla extract until smooth. Gradually add the dry ingredients into the wet ingredients while mixing gently. Once the dough starts coming together, fold in the chocolate chips and crushed graham crackers. The dough should look thick, rich, and loaded with texture. Be careful not to overmix because that can make the bars tough instead of soft.
2. Layer the Bars Carefully
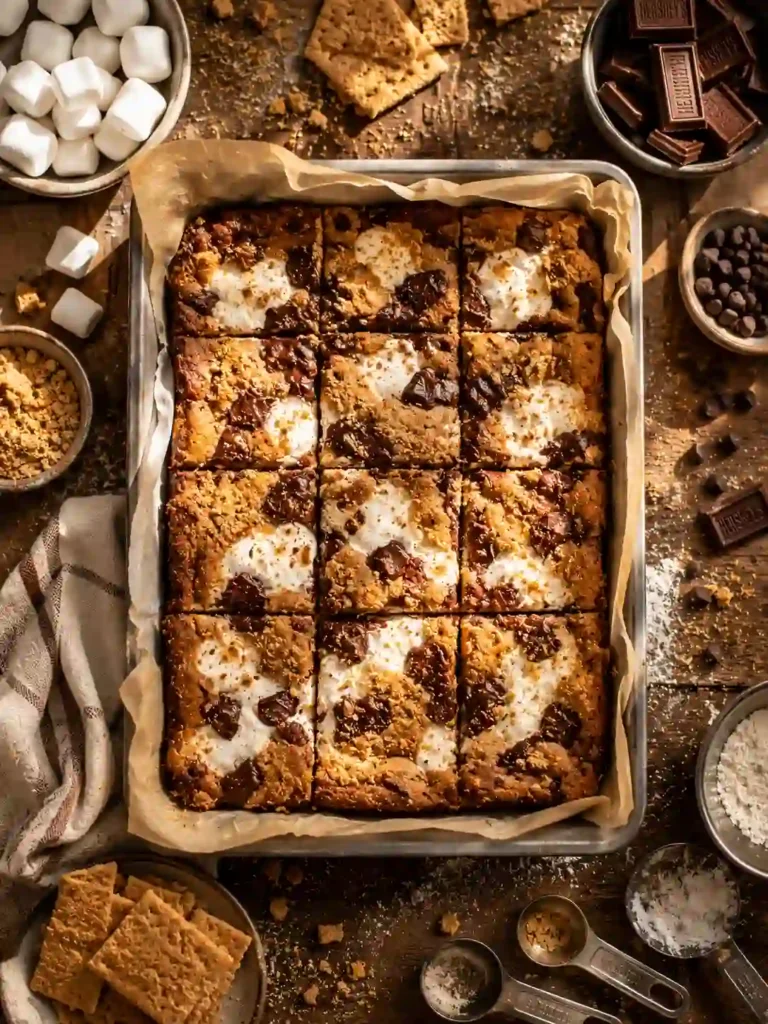
Press about two-thirds of the cookie dough evenly into the prepared baking pan. Use a spatula or lightly greased hands to spread it smoothly into the corners. Sprinkle mini marshmallows evenly across the top, followed by extra chocolate chips if desired. Add the remaining cookie dough in small flattened pieces across the top instead of one solid layer. This allows the marshmallow and chocolate filling to peek through while baking. This small trick makes a huge difference because exposed marshmallows become beautifully toasted and gooey. The bars should already look thick and packed with texture before baking. Sprinkle a few extra graham cracker crumbs on top for added crunch and bakery-style appearance. The mixture should feel soft, thick, and slightly sticky.
3. Bake Until Golden and Gooey
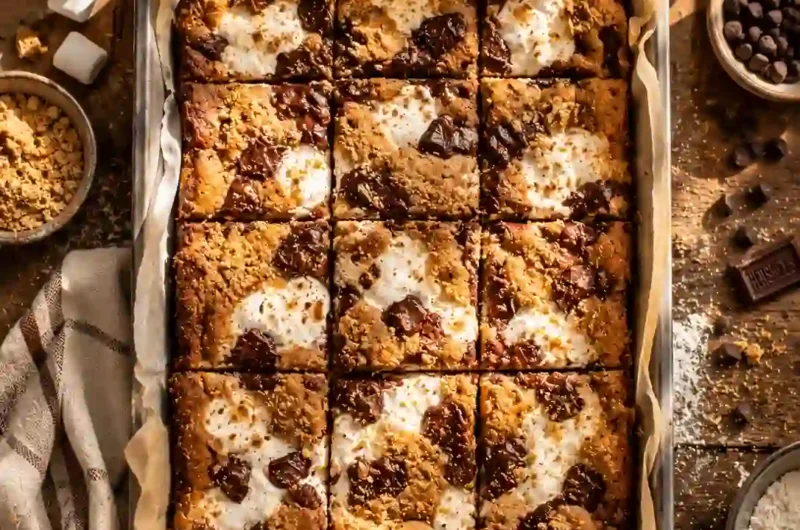
Place the baking pan into the oven and bake for about 28 to 34 minutes. The edges should turn golden brown while the center stays slightly soft. The marshmallows will puff up and become lightly toasted on top. Your kitchen will smell warm, buttery, and chocolatey while the bars bake. Do not wait for the center to become completely firm because the bars continue setting while cooling. Once baked, remove the pan from the oven and let it cool for at least 20 to 30 minutes before slicing. This helps the chocolate and marshmallow settle slightly so the bars hold together better. The finished bars should have gooey chocolate layers, soft chewy cookie texture, and lightly crisp edges. Serve slightly warm for the best melty texture.
Pro Tips
- Line the baking pan with parchment paper so the bars lift out easily without sticking.
- Use room temperature butter for smoother mixing and softer texture.
- Slightly underbake the bars for extra gooey centers.
- Let the bars cool before slicing so the layers hold together better.
- Add chocolate chunks on top before baking for bakery-style appearance.
- Use mini marshmallows because they melt more evenly than large marshmallows.
- Crush graham crackers into medium pieces instead of fine crumbs for better texture.
- Chill the dough for 10 minutes if your kitchen feels warm.
- Add flaky sea salt on top for sweet and salty flavor balance.
- Warm leftover bars for a few seconds before eating to bring back gooey texture.
Common Mistakes to Avoid
One common mistake is overbaking the bars, which dries out the centers quickly.
Another issue is pressing all the dough into one solid top layer, which traps the marshmallow texture.
Using old marshmallows can create chewy dry texture instead of gooey softness.
Some people skip parchment paper and struggle removing the bars cleanly.
Overmixing the dough may create tough cookie bars.
Adding too many marshmallows can cause overflow during baking.
Using cold butter prevents smooth dough texture.
Not measuring flour properly can make the bars dense.
Cutting the bars too early can create messy slices.
Using low-quality chocolate may reduce flavor richness.
Spreading dough unevenly can cause uneven baking.
Skipping cooling time may make the bars fall apart.
Using a pan that is too small can create underbaked centers.
Variations and Customization Ideas
You can make peanut butter s’mores bars by adding peanut butter chips.
For a cookies-and-cream version, mix crushed chocolate sandwich cookies into the dough.
Add caramel drizzle for extra gooey sweetness.
For a quick version, use store-bought cookie dough.
You can make a dark chocolate version for richer flavor.
Add chopped nuts for crunch and texture.
For a festive version, mix colorful candy pieces into the dough.
You can even turn these into ice cream sandwich bars.
Now let’s make it even better…
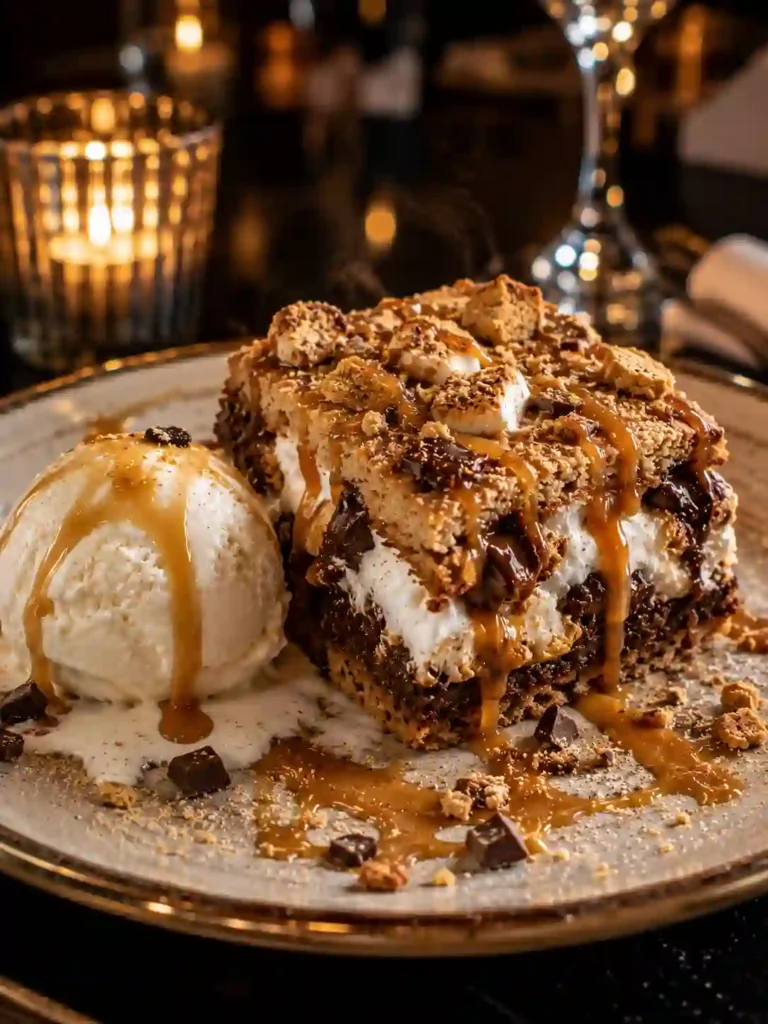
Try serving warm bars with vanilla ice cream on top.
Serving Ideas
Serve these bars warm with cold milk for classic comfort.
Add vanilla ice cream for extra creamy dessert flavor.
Cut them into smaller squares for party dessert trays.
Serve during movie nights, birthdays, and sleepovers.
Pair them with coffee or hot chocolate during cozy evenings.
Drizzle caramel sauce or melted chocolate over the top before serving.
Storage and Reheating
Store the bars in an airtight container at room temperature for up to 4 days.
For longer freshness, refrigerate them for up to 1 week.
You can freeze individual bars for up to 2 months.
To reheat, microwave a bar for about 10 seconds until soft and gooey again.
Keep parchment paper between stacked bars to prevent sticking.
Nutrition Facts
Approximate per bar:
- Calories: 310
- Carbohydrates: 42g
- Protein: 3g
- Fat: 14g
- Sugar: 26g
- Fiber: 1g
Quick Summary
- Soft and chewy dessert bars
- Loaded with gooey marshmallows and chocolate
- Easy beginner-friendly recipe
- Classic campfire s’mores flavor
- Perfect for parties and movie nights
- One-pan dessert for easy cleanup
- Rich buttery cookie texture
- Great make-ahead dessert option
When to Eat This
These S’mores Cookie Bars are perfect for movie nights when you want something warm, sweet, and comforting.
They also work great for after-school snacks, birthday parties, and family gatherings.
Need a late-night dessert craving fix?
Warm one in the microwave for a few seconds and the chocolate becomes melty all over again.
They are also perfect for bake sales, summer parties, road trips, holiday trays, and cozy rainy evenings when comfort desserts sound impossible to resist.
Easy S’mores Cookie Bars Loaded with Chocolate and Marshmallows
4
servings30
minutes40
minutes300
kcalIngredients
2 cups all-purpose flour – Gives the bars structure while keeping them soft and chewy.
1 teaspoon baking soda – Helps create soft texture and light rise.
1/2 teaspoon salt – Balances the sweetness and boosts flavor.
3/4 cup unsalted butter, softened – Adds rich buttery flavor and soft texture.
3/4 cup brown sugar – Creates chewy texture and caramel flavor.
1/2 cup granulated sugar – Helps create lightly crisp golden edges.
2 large eggs – Help hold the bars together while keeping them soft.
2 teaspoons vanilla extract – Adds warm bakery-style sweetness.
1 1/2 cups chocolate chips – Use milk chocolate for classic s’mores flavor or dark chocolate for richer taste.
1 1/2 cups mini marshmallows – These melt beautifully and create gooey texture.
1 cup crushed graham crackers – Adds crunch and classic s’mores flavor.
Optional: extra chocolate chunks for topping – Makes the bars look extra rich and bakery-style.
Directions
- Prepare the Cookie Dough
Start by preheating your oven to 350°F and lining a baking pan with parchment paper for easy removal later. In a medium bowl, whisk together the flour, baking soda, and salt until evenly mixed. In a larger mixing bowl, beat the softened butter, brown sugar, and granulated sugar together until the mixture becomes pale, creamy, and fluffy. This step helps create soft chewy bars instead of dense ones. Add the eggs one at a time while mixing slowly. Stir in the vanilla extract until smooth. Gradually add the dry ingredients into the wet ingredients while mixing gently. Once the dough starts coming together, fold in the chocolate chips and crushed graham crackers. The dough should look thick, rich, and loaded with texture. Be careful not to overmix because that can make the bars tough instead of soft. - Layer the Bars Carefully
Press about two-thirds of the cookie dough evenly into the prepared baking pan. Use a spatula or lightly greased hands to spread it smoothly into the corners. Sprinkle mini marshmallows evenly across the top, followed by extra chocolate chips if desired. Add the remaining cookie dough in small flattened pieces across the top instead of one solid layer. This allows the marshmallow and chocolate filling to peek through while baking. This small trick makes a huge difference because exposed marshmallows become beautifully toasted and gooey. The bars should already look thick and packed with texture before baking. Sprinkle a few extra graham cracker crumbs on top for added crunch and bakery-style appearance. The mixture should feel soft, thick, and slightly sticky. - Bake Until Golden and Gooey
Place the baking pan into the oven and bake for about 28 to 34 minutes. The edges should turn golden brown while the center stays slightly soft. The marshmallows will puff up and become lightly toasted on top. Your kitchen will smell warm, buttery, and chocolatey while the bars bake. Do not wait for the center to become completely firm because the bars continue setting while cooling. Once baked, remove the pan from the oven and let it cool for at least 20 to 30 minutes before slicing. This helps the chocolate and marshmallow settle slightly so the bars hold together better. The finished bars should have gooey chocolate layers, soft chewy cookie texture, and lightly crisp edges. Serve slightly warm for the best melty texture.
Notes
- Line the baking pan with parchment paper so the bars lift out easily without sticking.
- Add chocolate chunks on top before baking for bakery-style appearance.