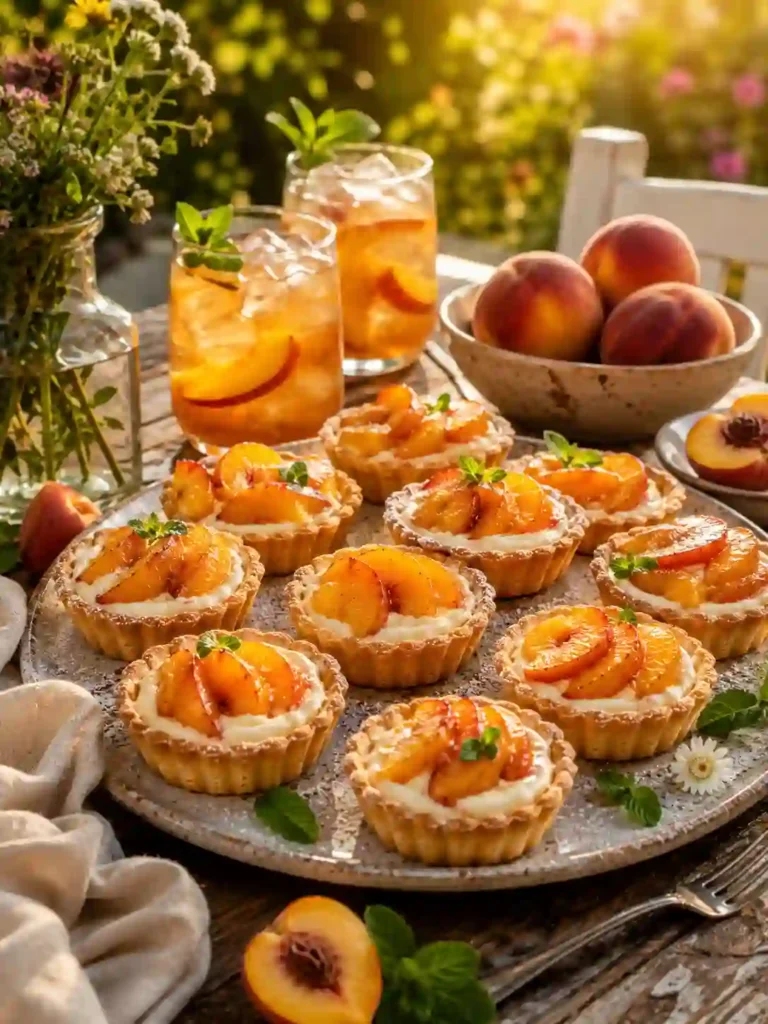
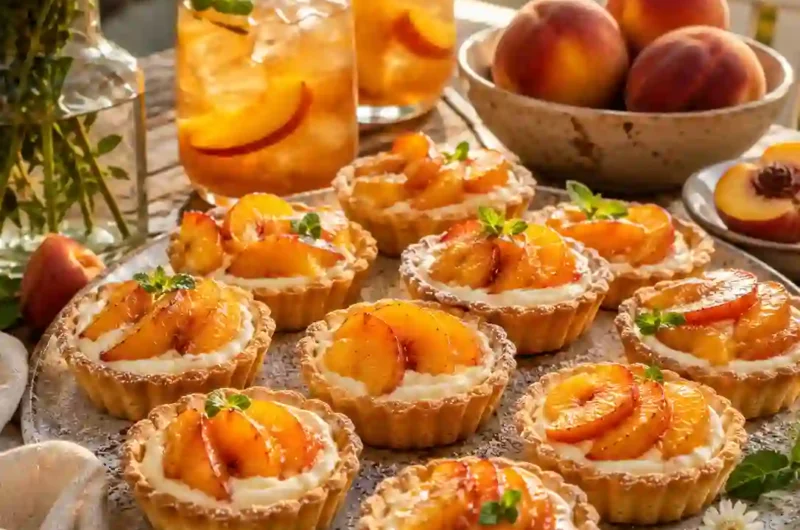
You know those desserts that look beautiful in bakery windows and make you think, “There is no way I can make that at home”?
These Mini Peach and Cream Cheese Tarts are the exact opposite.
They look elegant, colorful, and impressive, but they are secretly simple and easy to make. The flaky crust turns golden and crisp while the cream cheese filling becomes smooth, creamy, and slightly sweet.
Then come the peaches.
Soft, juicy, fresh peaches baked on top with a glossy finish that makes every tart look like a little summer dessert from a fancy cafe.
The best part?
You do not need complicated baking skills.
You do not need expensive ingredients.
And you definitely do not need hours in the kitchen.
These mini tarts are perfect when you want something cozy, creamy, fruity, and beautiful without the stress of making a giant dessert.
One bite gives you flaky crust, creamy filling, and sweet peach flavor all at once.
And honestly?
They disappear fast.
What Is This Recipe?
Mini Peach and Cream Cheese Tarts are small pastry desserts made with flaky tart shells filled with creamy sweetened cream cheese and topped with juicy peach slices.
The crust becomes buttery and crisp while the filling stays smooth and creamy inside. The peaches soften slightly while baking and add fresh fruity sweetness.
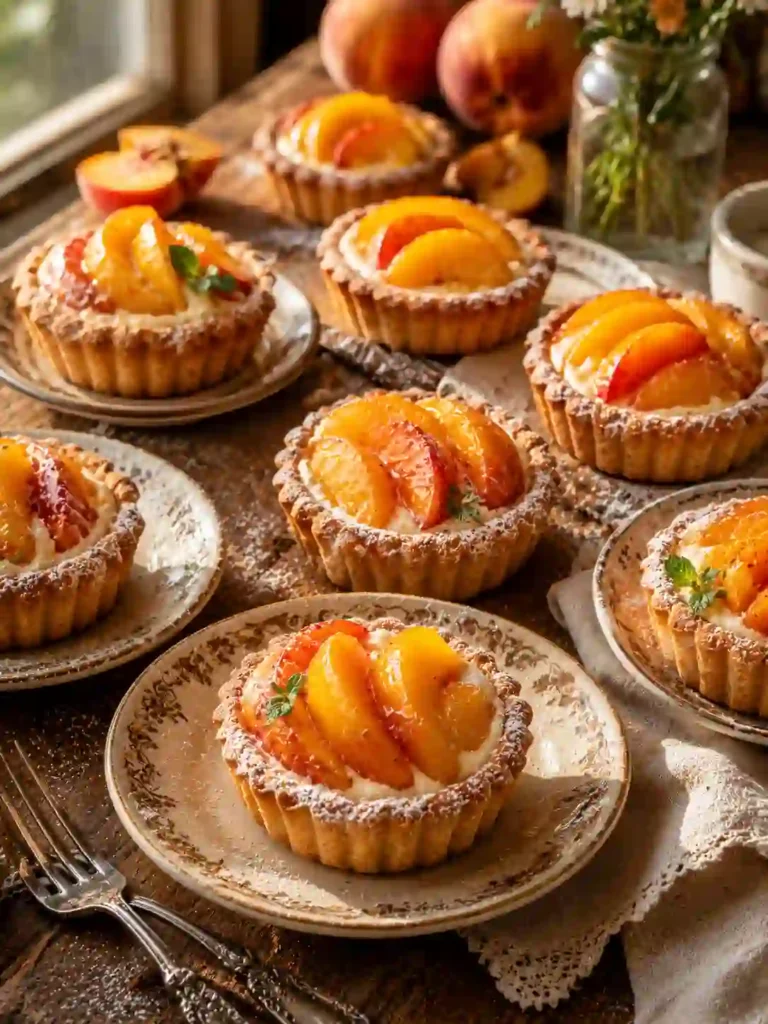
These little tarts feel fancy enough for parties and brunch tables, but they are easy enough for weekend baking at home.
What makes them special is the texture combination. You get crispy crust, creamy filling, and soft peaches in every bite.
They are sweet, refreshing, rich, and light all at the same time.
Why You Will Love This Recipe
- These tarts look bakery-quality without complicated baking steps.
- The recipe uses simple ingredients you can easily find.
- Mini desserts are perfect for parties and gatherings.
- The peach flavor tastes fresh, juicy, and naturally sweet.
- Cream cheese filling makes every bite smooth and rich.
- The crust bakes golden and crispy while staying buttery.
- You can prepare them ahead for stress-free entertaining.
- Homemade tarts cost much less than bakery desserts.
- They work great for brunch, dessert tables, and afternoon snacks.
- You can customize the fruit topping with different seasonal fruits.
Here’s where most people get this wrong…
They overfill the tart shells. Too much filling can spill over and make the crust soggy.
Ingredients
- 1 package refrigerated pie crust or tart dough – Saves time and creates flaky buttery tart shells.
- 2 medium fresh peaches, sliced thin – Use ripe peaches for the sweetest flavor and soft texture.
- 8 ounces cream cheese, softened – Creates rich creamy filling with smooth texture.
- 1/3 cup granulated sugar – Sweetens the filling without making it too heavy.
- 1 teaspoon vanilla extract – Adds warm bakery-style flavor.
- 1 egg yolk – Helps the filling become creamy and slightly rich.
- 1 tablespoon lemon juice – Brightens the peach flavor and balances sweetness.
- 1 tablespoon peach jam or apricot jam – Gives the peaches a glossy bakery-style shine.
- 1 tablespoon melted butter – Helps the crust bake golden and crisp.
- Optional cinnamon sprinkle – Adds warm cozy flavor.
- Powdered sugar for topping – Makes the finished tarts look elegant.
- Fresh mint leaves for garnish – Adds fresh color and beautiful presentation.
If peaches are not in season, canned peaches can work too. Just drain them very well first.
For extra flavor, add a little almond extract to the cream cheese mixture. It pairs beautifully with peaches.
How to Make Mini Peach and Cream Cheese Tarts
Step 1: Prepare the Tart Shells
Start by preheating your oven to 375°F. Lightly grease a muffin pan or mini tart pan so the crust releases easily after baking.
Roll out the pie crust on a lightly floured surface. Use a round cookie cutter or glass to cut circles slightly bigger than the muffin cups.
Press each dough circle gently into the pan.
Do not stretch the dough too much because stretched dough can shrink while baking.
Brush the edges lightly with melted butter for extra golden color.
The dough should look smooth and even inside each cup.
Place the tray into the refrigerator for 10 minutes before filling.
This small trick makes a huge difference…
Cold dough creates crisp flaky tart shells instead of soft greasy crust.
Step 2: Make the Cream Cheese Filling
In a medium bowl, mix the softened cream cheese, sugar, vanilla extract, egg yolk, and lemon juice.
Beat slowly until the mixture becomes smooth, creamy, and fluffy.
There should be no lumps.
The filling should look pale, silky, and thick enough to hold its shape.
Taste the mixture before filling the shells.
Want it sweeter?
Add a little more sugar.
Want extra flavor?
Add a tiny splash of almond extract.
The cream cheese filling should feel rich but not too heavy.
Step 3: Fill and Top the Tarts
Spoon a small amount of cream cheese filling into each tart shell.
Do not overfill because the filling puffs slightly while baking.
Arrange thin peach slices on top in small fan shapes or circles.
The peaches should slightly overlap for beautiful bakery-style presentation.
Brush a tiny bit of peach jam over the peaches for glossy shine.
If you like warm spice flavor, sprinkle a small pinch of cinnamon on top.
The tarts should already look colorful, creamy, and elegant before baking.
That is the magic of simple desserts done well.
Step 4: Bake Until Golden
Place the tart tray into the oven and bake for about 18 to 22 minutes.
The crust edges should turn golden brown while the filling becomes lightly set.
The peaches will soften slightly and release sweet juices during baking.
Your kitchen will smell buttery, fruity, and warm.
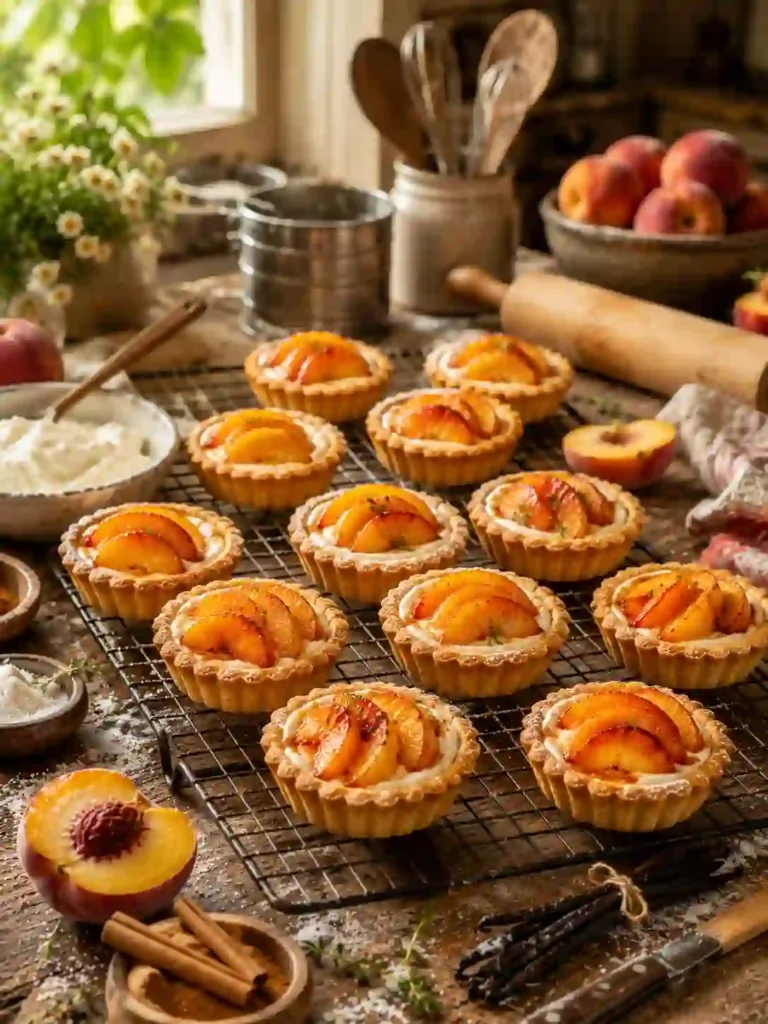
Once baked, let the tarts cool in the pan for 10 minutes.
Carefully remove them and place on a cooling rack.
Dust lightly with powdered sugar before serving.
The crust should feel flaky and crisp while the filling stays creamy inside.
Now comes the difficult part…
Trying not to eat three before they fully cool.
Pro Tips
- Chill the tart shells before baking because cold dough creates flakier crust.
- Slice peaches evenly so the tarts bake uniformly and look beautiful.
- Use ripe but firm peaches because overly soft peaches release too much liquid.
- Brush jam lightly on top for shiny bakery-style presentation.
- Do not overmix the cream cheese filling because too much air can create cracks.
- Let the cream cheese soften before mixing for extra smooth filling.
- Bake until the crust edges turn golden instead of pale.
- Use parchment paper under the pan for easier cleanup.
- Dust powdered sugar only after cooling so it does not melt immediately.
- Add crushed nuts on top for crunchy texture and richer flavor.
Common Mistakes to Avoid
- Overfilling the tart shells can cause messy overflowing filling.
- Using watery peaches may create soggy crust.
- Skipping the chilling step can make the crust shrink while baking.
- Using cold cream cheese may leave lumps in the filling.
- Overbaking can dry the filling and harden the crust.
- Cutting peaches too thick may stop them from softening properly.
- Forgetting to grease the pan can make removing tarts difficult.
- Adding too much sugar can overpower the fresh peach flavor.
- Using under-ripe peaches can make the tarts taste bland.
- Removing the tarts too early can cause breaking.
- Not brushing jam on top may make the peaches look dull.
- Baking at too high temperature can burn the crust edges quickly.
Variations and Customization Ideas
Want to make these mini tarts even more exciting?
Try these easy ideas.
- Add blueberries or raspberries for mixed fruit tarts.
- Use puff pastry instead of pie crust for lighter texture.
- Add cinnamon sugar on top before baking.
- Make a high-protein version using Greek yogurt mixed into the filling.
- Use dairy-free cream cheese for a vegan-friendly option.
- Add honey drizzle after baking for extra sweetness.
- Sprinkle chopped pecans or almonds on top for crunch.
- Use canned peaches for quick year-round baking.
- Add caramel drizzle for richer dessert flavor.
- Turn them into mini breakfast pastries with lighter sweetness.
Now let’s make it even better…
Serve these warm with vanilla ice cream and watch the creamy filling melt into the flaky crust.
Serving Ideas
- Serve during brunch with coffee or tea.
- Add them to dessert trays for parties.
- Enjoy as an afternoon snack during summer.
- Serve warm with vanilla ice cream.
- Pack them for picnics and family gatherings.
- Pair with lemonade during hot weather.
- Add fresh mint on top before serving guests.
- Enjoy late at night when sweet cravings hit.
Storage and Reheating
Store the tarts in an airtight container in the refrigerator for up to 4 days.
For the best texture, let them sit at room temperature for about 10 minutes before eating.
To reheat, place them in the oven at 300°F for about 5 minutes.
Avoid microwaving too long because the crust can become soft instead of flaky.
You can also freeze the baked tarts for up to 1 month.
Nutrition Facts
Approximate per tart:
- Calories: 180
- Carbohydrates: 18g
- Fat: 10g
- Sugar: 9g
- Protein: 3g
- Sodium: 120mg
Quick Summary
- Easy mini bakery-style peach tarts
- Creamy sweet cream cheese filling
- Flaky golden crust with juicy peaches
- Perfect for brunch and summer desserts
- Beginner-friendly recipe
- Beautiful party dessert presentation
When to Eat This
These Mini Peach and Cream Cheese Tarts fit almost every sweet moment.
Need a quick dessert for guests?
These look impressive without much work.
Want a cozy afternoon treat with coffee?
The flaky crust and creamy filling taste amazing together.
Need a light summer dessert after dinner?
The peaches make these feel fresh and refreshing.
These Mini Peach and Cream Cheese Tarts Look Fancy but Are So Easy
Course: Uncategorized4
servings30
minutes40
minutes300
kcalIngredients
1 package refrigerated pie crust or tart dough – Saves time and creates flaky buttery tart shells.
2 medium fresh peaches, sliced thin – Use ripe peaches for the sweetest flavor and soft texture.
8 ounces cream cheese, softened – Creates rich creamy filling with smooth texture.
1/3 cup granulated sugar – Sweetens the filling without making it too heavy.
1 teaspoon vanilla extract – Adds warm bakery-style flavor.
1 egg yolk – Helps the filling become creamy and slightly rich.
1 tablespoon lemon juice – Brightens the peach flavor and balances sweetness.
1 tablespoon peach jam or apricot jam – Gives the peaches a glossy bakery-style shine.
1 tablespoon melted butter – Helps the crust bake golden and crisp.
Optional cinnamon sprinkle – Adds warm cozy flavor.
Powdered sugar for topping – Makes the finished tarts look elegant.
Fresh mint leaves for garnish – Adds fresh color and beautiful presentation.
Directions
- Prepare the Tart Shells
Start by preheating your oven to 375°F. Lightly grease a muffin pan or mini tart pan so the crust releases easily after baking.
Roll out the pie crust on a lightly floured surface. Use a round cookie cutter or glass to cut circles slightly bigger than the muffin cups.
Press each dough circle gently into the pan.
Do not stretch the dough too much because stretched dough can shrink while baking.
Brush the edges lightly with melted butter for extra golden color.
The dough should look smooth and even inside each cup.
Place the tray into the refrigerator for 10 minutes before filling.
This small trick makes a huge difference…
Cold dough creates crisp flaky tart shells instead of soft greasy crust. - Make the Cream Cheese Filling
In a medium bowl, mix the softened cream cheese, sugar, vanilla extract, egg yolk, and lemon juice.
Beat slowly until the mixture becomes smooth, creamy, and fluffy.
There should be no lumps.
The filling should look pale, silky, and thick enough to hold its shape.
Taste the mixture before filling the shells.
Want it sweeter?
Add a little more sugar.
Want extra flavor?
Add a tiny splash of almond extract.
The cream cheese filling should feel rich but not too heavy. - Fill and Top the Tarts
Spoon a small amount of cream cheese filling into each tart shell.
Do not overfill because the filling puffs slightly while baking.
Arrange thin peach slices on top in small fan shapes or circles.
The peaches should slightly overlap for beautiful bakery-style presentation.
Brush a tiny bit of peach jam over the peaches for glossy shine.
If you like warm spice flavor, sprinkle a small pinch of cinnamon on top.
The tarts should already look colorful, creamy, and elegant before baking.
That is the magic of simple desserts done well. - Bake Until Golden
Place the tart tray into the oven and bake for about 18 to 22 minutes.
The crust edges should turn golden brown while the filling becomes lightly set.
The peaches will soften slightly and release sweet juices during baking.
Your kitchen will smell buttery, fruity, and warm.
Once baked, let the tarts cool in the pan for 10 minutes.
Carefully remove them and place on a cooling rack.
Dust lightly with powdered sugar before serving.
The crust should feel flaky and crisp while the filling stays creamy inside.
Now comes the difficult part…
Notes
- Chill the tart shells before baking because cold dough creates flakier crust.
- Slice peaches evenly so the tarts bake uniformly and look beautiful.